How to make your lipstick kiss-proof: 5 easy tips

How to make your lipstick kiss-proof: 5 easy tips
Kiss-proof lipstick is a must-have for any woman who wants to keep her lip color looking flawless all day long. Whether you’re going on a date, attending a special event, or simply running errands, a kiss-proof lipstick will help you look and feel your best.

But what if your favorite lipstick isn’t kiss-proof? Or what if you’re on a budget and can’t afford to buy a new one? Don’t worry, there are a few easy tips you can follow to make any lipstick kiss-proof.

1. Start with a clean, exfoliated lip : This will help your lipstick adhere better and last longer.
2. Apply a thin layer of lip liner : This will help to create a barrier between your lips and your lipstick, preventing it from bleeding or transferring.
3. Apply two thin layers of lipstick : This will give you more coverage and help your lipstick last longer.
4. Blot your lips with a tissue. : This will remove any excess lipstick and help to set it in place.
5. Dust a light layer of translucent powder over your lips : This will help to further set your lipstick and make it kiss-proof.

Here are some additional tips that can help you make your lipstick kiss-proof:

Use a lip primer :  A lip primer is specifically designed to help lipstick last longer. It creates a smooth, even surface for your lipstick to adhere to, and it also helps to prevent it from bleeding or transferring.

Avoid eating or drinking anything greasy or oily before applying your lipstick. Greasy and oily foods and drinks can break down your lipstick and make it less likely to last.

If you’re going to be eating or drinking something greasy or oily, reapply your lipstick afterwards.

If you’re worried about your lipstick transferring onto your partner, try using a lip stain instead. Lip stains are more long-lasting and less likely to transfer than lipstick.

With these simple tips, you can easily make any lipstick kiss-proof and enjoy your favorite lip colors all day long.

Here are some additional tips from beauty experts:

  • Use a lip brush. A lip brush will help you apply your lipstick more evenly and precisely.
  • Apply your lipstick in thin layers. It’s better to apply multiple thin layers than one thick layer.
  • Set your lipstick with a setting spray. A setting spray will help to lock your lipstick in place and make it last longer.
    With these tips, you can create a kiss-proof lipstick look that will last all day long.

Tagged : / / / /

7 Easy Ways to Keep Your House Clutter Free

7 Easy Ways to Keep Your House Clutter Free
Clutter can be a major source of stress and anxiety. It can make your home feel cramped and uninviting, and it can make it difficult to find the things you need. If you’re tired of living in a cluttered space, here are 7 easy ways to keep your house clutter free:

1. Declutter regularly
The key to keeping your house clutter free is to declutter regularly. This doesn’t mean you have to do a major decluttering project all at once. Instead, set aside some time each week to declutter one room or one area of your home. You can also declutter as you go, by getting rid of things as you no longer need them.

2. Create a place for everything
Once you’ve decluttered, it’s important to create a place for everything in your home. This will help you keep your things organized and prevent them from becoming clutter. When you put things away, make sure you put them in the right place. This will save you time and frustration in the long run.

3. Get rid of the “maybe” pile
The “maybe” pile is a breeding ground for clutter. It’s the pile of things that you’re not sure if you need or want. If you have a “maybe” pile, take some time to go through it and get rid of the things you don’t need. If you’re not sure if you need something, ask yourself the following questions:

  • Have I used this in the past year?
  • Do I have a plan to use this in the future?
  • Does this bring me joy? If you can’t answer yes to any of these questions, get rid of the item.

4. Don’t bring new clutter into your home
The best way to keep your house clutter free is to stop bringing new clutter into your home. This means being mindful of what you buy and what you bring into your home. Before you bring something new into your home, ask yourself if you really need it. If you don’t need it, don’t buy it.

5. Set a timer
If you’re feeling overwhelmed by the clutter in your home, try setting a timer for 15 minutes and decluttering for that amount of time. Once the timer goes off, take a break and then come back to it later. This is a great way to make decluttering less daunting and more manageable.

6. Get the whole family involved
If you have a family, get everyone involved in keeping the house clutter free. This will make it easier to declutter and organize your home, and it will also teach your children good habits for keeping their own belongings clutter free.

7. Reward yourself
When you declutter your home, reward yourself for your hard work. This will help you stay motivated and make decluttering a more enjoyable experience. You can reward yourself with a new book, a piece of jewelry, or anything else that you enjoy.

Decluttering and keeping your house clutter free can be a challenge, but it’s worth it in the end. A clutter-free home is a more peaceful and relaxing place to live. It’s also easier to find the things you need, and it can even save you money. So if you’re ready to say goodbye to clutter, give these tips a try.

Tagged : / / /

How to buy the best smart watch for you?

How to buy the best smart watch for you?
Smartwatches are a great way to stay connected, track your fitness, and even make payments. This is why lots of people are buying smart watches nowadays. But how do you know if you have bought the right one? Also smart watches have their own advantages and disadvantages. Read on to find some important points about smart watches and then you can make an informed decision about which one to buy!

Advantages of a smart watch:

Convenience : Smartwatches allow you to stay connected without having to constantly check your phone. You can receive notifications, make and receive calls, and even send text messages from your wrist.
Fitness tracking: Many smartwatches come with built-in fitness trackers that can track your steps, heart rate, and other metrics. This can be a great way to stay motivated and track your progress towards your fitness goals.
Payments: Some smartwatches can be used to make payments with a variety of payment methods, such as Apple Pay or Google Pay. This can be a convenient way to pay for purchases without having to carry your wallet.
Entertainment : Smart watches can be a good source of entertainment too if you do not have any other option and need to pass the time. You can listen to music, watch videos and play games on your smart watch.
Customization : Many smartwatches can be customized with different watch faces, bands, and apps. This allows you to personalize your watch to fit your own style and needs.

Disadvantages associated with smart watches :

Limited battery life : Smartwatches typically have a shorter battery life than smartphones. This means you may have to charge your watch multiple times a day, depending on how much you use it.
Limited functionality : Smartwatches are not as powerful as smartphones, and some apps and features may not work as well on a watch as they do on a phone.
Price : Smartwatches can be expensive, especially the high-end models.
Privacy concerns : Smartwatches collect a lot of personal data, such as your location, contacts, and browsing history. This can raise privacy concerns for some people.

Overall, smartwatches can be a great way to stay connected, track your fitness, and even make payments. However, it is important to weigh the advantages and disadvantages before making a purchase. Here are some additional factors to consider when buying a smartwatch:

1 Your needs: What do you want to use your smartwatch for? If you are looking for a device to stay connected and track your fitness, then a basic smartwatch may be sufficient. However, if you want a device with more features, such as making payments or playing music, then you will need to buy a more expensive model.
2 Your budget: Smartwatches can range in price from a few hundred dollars to over a thousand dollars. It is important to set a budget before you start shopping so that you do not overspend.
3 The operating system: Smartwatches run on a variety of operating systems, such as Android, iOS, and Wear OS. It is important to choose a smartwatch that runs on the same operating system as your smartphone so that you can easily sync the two devices.
4 The features: Smartwatches come with a variety of features, such as fitness tracking, heart rate monitoring, GPS, and NFC payments.

Choose a smartwatch that has the features that are most important to you

Tagged : / / /

This is why your laptop charger has a small cylinder

Even if you are not computer savvy, you must have all used computers at least once in our life time or have seen people using laptops at office or coffee shops. The tiny parts that are assembled in that small case, that makes a truly portable computer, may fascinate you. However, you need to charge the laptop using the charging cable that came with it, to keep in alive.

In 1971, personal computers came into existence that people could afford to buy. Once PCs became popular, the thought of building portable computers struck people. The first well-known and most usually used modern laptop was IBM N40 laptop in 1994. With the arrival of Microsoft’s Windows operating system, laptops became a craze and since then, people have used laptop.

You must have seen small cylinder at the end of the charging cable, and yet, you would have not thought of it as something serious. However, it plays a major role in keeping your laptop working.

Your laptop is made up of several moving parts like hard disk drive and CD drive that generates vibrations as they move and complete their work. The laptop comes with a battery that needs to be charged so that you can use it during power failure or when there is no power supply. The charging cable has a cylinder called ferrite bead near the end of it and it is one of the most fascinating part of the computer.

The moving part of the laptop vibrates and produces radio frequencies. These radio frequencies can obstruct with things like Wi-Fi router of your home, the dish connection and other things. Though the laptop case reduces those vibrations and prevent them from causing any interference, but the charging cord, being unprotected, may help in spreading those vibrations.

The charging cable acts as antennae and airs the vibration as radio frequencies picks up other frequencies and cause interference both in nearby equipment and in laptop.

Your Wi-Fi acts violently if these signals compete at the same frequency at which your Wi-Fi works. This is where, the cylinder plays a role on the charging cable. The cylinder has Ferrite, which is an alloy of Iron oxide or rust.

This ferrite bead kills signals that the charging cable airs or catches. It is a simple and cheap way of keeping your laptop from interfering with other electronic devices in your home.

As a technology lover you may like our daily important technology news series. It’s a playlist and you can retrieve the total day-wise videos. Please consider subscribing our YouTube channel:

Author: Technology Vista

Tagged : /

THIS is how to make a recovery drive and reinstall the Operating System if your PC is down!

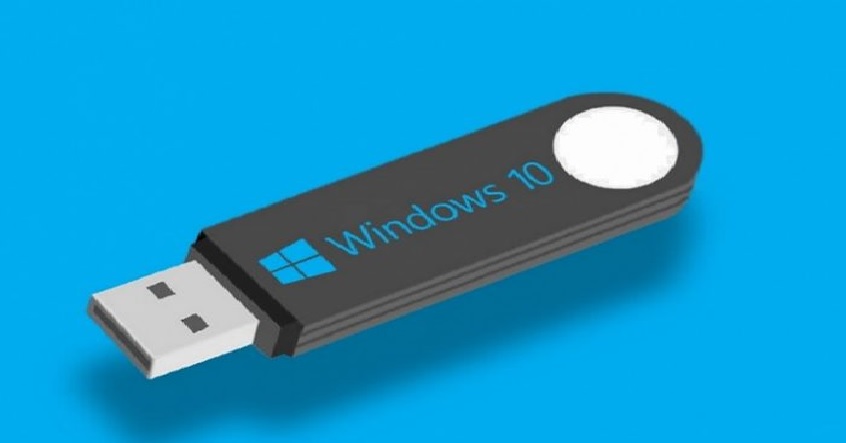
Many users consider Windows 10 as one of the best operating system. But, their major concern is re-installation of the OS when something goes wrong. In case of any problem, they will have to start it by using a USB recovery drive, which will help them in trouble shooting and fixing the problems. A USB recovery drive is same as a system repair disk, but instead of a DVD or CD, it uses a USB drive.

windows-10-recovery-drive

In case your PC has a recovery partition; you can copy that on the recovery drive, and reset your PC with the help of that. Once you have copied the recovery partition, delete it from your PC, as it provides a lot of free space to your PC.

To create USB recovery drive you need two things, they are: 

  1. A USB drive with at least 4GB of memory.
  2. Windows 10 OS running on your PC

Here are instructions you need to follow to create a USB recovery drive.

  1. Open control panel, there is an option of ‘Recovery’. Click on ‘create recovery drive’ under that option.
  2. The system may either ask you for an admin password or may ask to you confirm.
  3. Select the option, ‘Back up system files to the recovery drive’.
  4. Make sure your USB drive is connected to the PC. Select the USB drive and click ‘Next’.
  5. Click on ‘create’ option. This may a take a little time.
  6. Once the files are copied, you will see an option; ‘delete the recovery partition from your PC’. If you require disk space, and then select ‘delete’. Click ‘finish’ incase you do not want to delete the recovery partition.

Following things must be taken care of while creating the recovery drive, they are: 

  • You cannot create recovery drive in Windows safe mode.
  • Recovery drive can be created in 64 bits Windows 10, and only 64 bits Windows 10 can be repaired with it.
  • Uncheck the option, ‘ Back up system files to recovery drive’. If you are getting an error message while creating a recovery drive.

As a technology lover you may like our daily important technology news series. It’s a playlist and you can retrieve the total day-wise videos. Please consider subscribing our YouTube channel:

Author: Technology Vista

Tagged : /

THIS is how to recover data from a dead computer!

When, a computer becomes dead, everyone assumes that all the data is also gone along with the computer. But, believe it or not, recovering data from a dead computer is not that difficult. Normally companies follow a very common template of recovering data. Here, are the steps to recover files from a dead computer:

Get an external hard disc drive which can host a hard disk and connect to a computer via USB post.

Borrow a computer which is compatible as the old one in terms of file system. For example, if one has windows filesystem then he/she must get another windows computer. It is to be ensured that it has sufficient space to accommodate recovered files.

A Windows hard drive user can insert a Mac into their computer. But, that will be able to read but not write the contents of the hard drive. One has do install a separate driver in order to perform this function.

It is very important to remove the hard drive from the dead PC. Unplugging and removal of the battery is needed for this. Turn it over and unscrew the screws. Unscrew the hard drive cover and remove the hard drive.

You have to remove the disc enclosure plate and insert it into the external hard drive interface. The adaptor can then be pulled off, thus ensuring connectivity between the drive and enclosure connector plate.

The hard drive is needed to be inserted into the enclosure.

Connect the hard drive to a working computer. It must be ensured that the computer is on. An icon will appear once the drive is connected.

It is compulsory to recover and explore files by either copying and pasting or clicking and dragging. This process may take few hours to complete.

Once this is done the window on the dead drive needs to be closed.

Right click the USB icon and click eject. Now the old hard drive can be detached.

This process is simple for desktops but not easy for laptops, especially closed laptops that cannot be opened so easily. You might need the help of a computer engineer who can pull the hard drive and recover the data for you.

It is always advisable for you to avoid a scenario like this. Always keep multiple back up of the data as a practice.

width="560" height="314" allowfullscreen="allowfullscreen">

As a technology lover you may like our daily important technology news series. It’s a playlist and you can retrieve the total day-wise videos. Please consider subscribing our YouTube channel:

Author: Technology Vista

Tagged : /

VLC Media Player Is Enough to Download YouTube Videos! here is how!

We all love VLC Media Player, right? Especially movie lovers because it is the only media player which can play almost every video format without the need to install any additional codec packs. Previously, we shared an article where we had described how you can play YouTube videos in VLC media player. Now, we bring to you share another VLC trick which will let you download YouTube videos. Without any additional app, you can download videos directly off YouTube using just VLC media player.

  1. First of all, you need to download and install VLC media player if you haven’t installed it on your computer yet.
  2. Now you need to browse the video in the YouTube that you want to download it using VLC media player. Copy the link and have it ready.
  3. Now in VLC, you need to click on Media tab and then select the option “Open Network Stream”. Or the other way to open capture device is by pressing CTRL+N.
  4. Simply paste the video URL in the URL box there and click on Play. Once the video starts playing in VLC media player, you need to click on “Tool” tab and then select “Codec Information”.
  5. It will give you the location of the CODEC. Actually, the link is the download link. Simply copy it and paste it in your browser. Once you paste the URL in the browser, your video will automatically start downloading.

There, you have it! Go on try it out.

As a technology lover you may like our daily important technology news series. It’s a playlist and you can retrieve the total day-wise videos. Please consider subscribing our YouTube channel:

Author: Technology and Beyond

Tagged : /

Website Builders – The Future or Just a Gimmick?

Unless you’ve been living under a rock, you’ve no doubt seen those new fangled online website builders / designers advertised on TV. They claim to be the next big thing and will allow you to create a nice new sleek looking website – for free! This news undoubtedly had web designers and developers alike running for the hills but are they all they’re cracked up to be or just the next gimmick in a long line of gimmicks designed to line the pockets of some rich web geeks? Or are they something more? Do they have a place in the market or are they simply a fad which will die out when their user base realises that in order to succeed on the web you need something significantly more than a 5 page website that looks identical to that of your competitor.

In this article we’ll going to discuss the specific providers along with a brief explanation of what they are and what you can do with them should you feel the need to try one out. Be warned, I’m not the biggest fan of online web design applications but I can see that they do have a place in the market for a highly specific niche – they most certainly do not cater for everyone. But I’ll try to keep an objective view on the matter for the purpose of a fair write up on the same.

What They Are

Online web designers do exactly what they say on the tin. They allow you to build and create a website using a 100% web based interface. Using drag and drop functions written in Javascript you can drag elements such as images, text blocks and forms onto what is effectively a blank canvas and magically turn that into a fully functional web page with its own domain name and all the bells and whistles that go with it. This is obviously a big draw for those who don’t have the budget to hire a designer, a developer or have the time or knowledge to undertake such a task in the traditional way. This is part of the attraction but I feel it’s the limitations of such that makes them simply too primitive for those who want a little more than a personal homepage. And you’d have to argue as to whether you need such a basic personal homepage when your social profiles contain pretty much the same sort of information you personal website would – just with much more in the way of features and functions.

The Options

The big four as I like to call them are Wix.com, Moonfruit.com, Weebly.com and SquareSpace.com. There are also smaller offerings that come bolted onto web hosting companies. The PrestoWebsite service from HostPresto.com is a great example of this.

Price wise and feature/function wise, you’ll find them difficult to split. They’re all pretty much priced the same and you’d struggle to tell them apart if you lined up the interfaces side by side and excluded the branding. Some however do make you pay more for bolt ons than others. But for a basic build they’re extremely similar.

Their Place in The Market

As touched on above, they would have you believe that they cater for everyone and that their services have truly cornered the market by way of Microsoft or Apple proportions. But, the reality is somewhat different. The main user base seems to consist of first timers creating their first website before moving onto something more detailed and complex right through to pensioners who are bored in their retirement village and want to try their hand at something online. But the developers won’t care given they have no outlay per customer so if someone stays for a month, it’s all profit.

Limitations

The limitations would have to be the fact that once you’ve built your site there. You’re stuck there. No changing hosts etc. It stays where it is. Also, if you want to do anything other than build a highly basic site then you’ll struggle. Basic pages of text and images are fine but if you want any kind of proper CMS or interactivity of any kind you’re best off going elsewhere.

Conclusions

So with all this in mind, what do you think of these new tools? Are they here to stay or will they die a slow and painful death like the recently released new global top level domain extensions. I read countless articles saying that they’re the future of the web but in reality, they’ve not took off at all. I feel these new online tools will go the same way. They’ve been put out there because of the capabilities of the likes of jQuery and Angular which has allowed developers to create such a tool but when it comes down to it, there is really no substitute for hiring a proper web designer or developer.

Author: Technology and Beyond

Tagged : /

Will tapping a Fizzy Drink Can prevents it from foaming over?

Isn’t it one of the most amazing sounds of summer? The sound of the fizz or the one when the can pops open? But its popularity sure doesn’t stop the beer or the fizz from coming out.

The refreshing hissing sound on opening a can of an aerated drink is caused by the gas bubbles that try to escape from the bottle due to the insolubility of CO2 in it. This is caused due to the change in the pressure for bar 3 to 1 on opening the can at atmospheric pressure. Co2’s solubility in water reduces and comes down to as much as -3 form -4.5 at atmospheric pressure, the phenomenon described in Henry’s Law.

The microscopic gas bubbles attach themselves to the inside of the can (nucleation) before it is opened. On the opening of the can, these bubbles increase in number due to lack of solubility of CO2. When these bubbles reach a definite size they separate from the inside of the can and rise up to the top of it due to buoyancy. Displacing liquid on their path.

Here tapping the top of the can plays its part. This technique works or not is a debate but there are studies that state, it may. As described earlier, the bubbles in the can nucleate at the walls so tapping can dislodge the bubbles, allowing them to float on the liquid.

The bubbles expand in size when the can is opened, with those deeper in the liquid travelling to the top and those shallower on the surface, displacing more of the liquid and resulting in larger amounts of liquid being cast out. A “tapped” can will have less “deep” bubbles and so less liquid will be casted out – and possibly sprayed out – than an “untapped” can.

Bubbles can also be dislodged from the side of the can with intense shaking, this method presents more hurly-burly which increases the energy in the system, causing more bubbles in the drink and more squirting when opened. Tapping the top of beer bottle with another has a similar effect, resulting in a colossal outburst of beer foam. This is because of the “mushroom clouds” created inside the bottle that gush huge quantities of liquid as they escape.

Glass and gushing

The debate of tap on top aside, the actual material that forms the container may also reduce gushing. Studies say that the amount of foam formed when beer is poured into glasses of different “wet abilities” explaining the extent to which water wets a material.

When it comes to the level of gushing another important factor is the stabilization of the bubbles which is caused by the presence of large molecules in the drink. This is the reason why some beers have long-lived foam heads. Such foam stabilizing agents are a conversation for another day.

This summer try different ways to open your fizzy drink – and see how much of it ends up on you!

As a technology lover you may like our daily important technology news series. It’s a playlist and you can retrieve the total day-wise videos. Please consider subscribing our YouTube channel:

Author: Technology and Beyond

Tagged : /

You can create a spectacular mini volcano by dumping a bucket of dry ice in a pool

Having a pool party at your home? All drinks and music and games arranged? Then add one more thing to this party… a super cool pool trick that will surprise every one present there. This trick involves the use of dry ice so you will have to careful with that. For those who do not know what dry ice is, it is basically super-frozen carbon dioxide. It forms when carbon dioxide is exposed to extreme temperatures of at least -109° Fahrenheit, which causes it to change from a gas straight into solid which means it never passes through the liquid phase in between. So when you reverse the process, ice melts and directly becomes gas.

Popular YouTube person the Crazy Russian hacker has utilized the same properties of dry ice to tell you about an amazing trick via a video (the link of the video is given at the end of the article). He was toying with the idea of throwing dry ice into the pool and what would happen after that. So he proceeded to do just that. He dumped about thirty pounds of dry ice straight into the swimming pool. He started with one empty cooler, a pair of insulated gloves and a bunch of bags of dry ice. First he wore the gloves on and then broke the dry ice blocks into the cooler.

After doing all this, very carefully he picked up the cooler containing the 30 pounds of ice and dumped it straight into the pool. It produced an instant reaction. As soon as the dry ice came in contact with the warm water of the pool, it began to break down and melt the dry ice and produced a thick, white, dense fog that drifted up away in the breeze. The sight is just spectacular. Everyone is bound to love this once you do the trick.

The trick is sure to be a hit amongst your peers or family and it may seem dangerous too to some people, but this is not the case if you practice the most basic caution- wearing insulated gloves while handling it, otherwise you can have serious frost bites on your hands. Also while breaking the dry ice blocks you should wear protective eye wear. Other than that, you can have as much fun as you want with the trick. For a detailed view, refer the video below:

width="560" height="314" allowfullscreen="allowfullscreen">

[adinserter block=”7″]

As a technology lover you may like our daily important technology news series. It’s a playlist and you can retrieve the total day-wise videos. Please consider subscribing our YouTube channel:

Author: Technology and Beyond

Tagged : /

Some common iPhone problems that you can solve in a jiffy

Your iPhone is your status, your heart and not to forget your best friend because this is what keeps you connected to the world. But just like any other smartphone, it has its sets of problems. But if you know how to tackle these then you will not get irritated when you are stuck with one of the most common problems in an iPhone. So go ahead and sort them yourself…. With a little help from this post!

The screen just ‘froze’

iphone-3

We know…. This is one of the most annoying things but what can be done if it happens is what matters. First try to shut it off and on, and if that doesn’t work- hard reset the device. To hard reset the device, just hold on the home button and the power button at the same time for about 10 seconds until the Apple logo appears on the screen. But you have to be careful while doing this because this may result in loss of some data.

The low battery problem

iphone-2

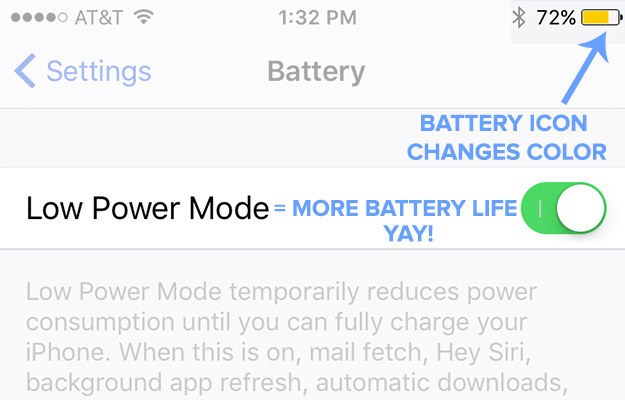
This one is also not something that the iPhone users don’t know about. You know the feeling of battery running out even before your day is over. In such situations, go to Settings>General>Battery and enable the Low Battery option followed by turning off the Battery Assist. In addition to this, go to Settings> Battery to see which apps are draining away your battery and shut them off.

“The storage is almost full” caption

iphone-1

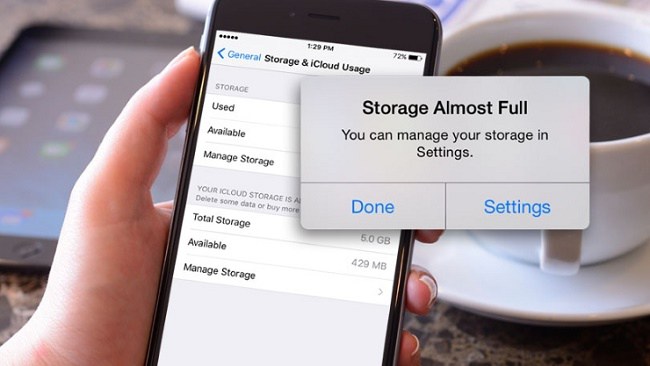
You know this if you are an iPhone user because iPhones like other   Android phones doesn’t have a memory card slot so you can’t extend its memory using one! So the best option is to buy the iPhone with 128GB storage. But if you have exhausted all your storage, you don’t need to panic. Just go to Settings>General>Storage>Manage storage and check what I causing the problem. Also, use Google Photos to store unlimited photos and videos to save that precious storage.

Next Page For More

Tagged : /

This is how you can create password protected folders without using any software

If more than one people use your device then securing personal files/software can be an issue.

Here is, how you can secure your files by creating a password for it.

Create a new ‘Text Document’ in a new folder, by right clicking and choosing new-> Text document.

Copy and paste this in the text document.

cls @ECHO OFF title Folder Private if EXIST “Control Panel.{21EC2020-3AEA-1069-A2DD-08002B30309D}” goto UNLOCK if NOT EXIST Private goto MDLOCKER :CONFIRM echo Are you sure you want tolock the folder(Y/N) set/p “cho=>” if %cho%==Y goto LOCK if %cho%==y goto LOCK if %cho%==n goto END if %cho%==N goto END echo Invalid choice. goto CONFIRM :LOCK ren Private “Control Panel.{21EC2020-3AEA-1069-A2DD-08002B30309D}” attrib +h +s “Control Panel.{21EC2020-3AEA-1069-A2DD-08002B30309D}” echo Folder locked goto End :UNLOCK echo Enter password to unlockfolder set/p “pass=>” if NOT %pass%== password here goto FAIL attrib -h -s “Control Panel.{21EC2020-3AEA-1069-A2DD-08002B30309D}” ren “Control Panel.{21EC2020-3AEA-1069-A2DD-08002B30309D}” Private echo Folder Unlocked successfully goto End :FAIL echo Invalid password goto end :MDLOCKER md Private echo Private created successfully goto End :End

Find ‘Password here’ in the above code and change it to the password of your choice.

Click on file->save as, save with the name of your choice, with .bat extension. For example, Secret.bat

Close note pad and go to the new folder, you will see a “SECRET” command.

Double click on this file, A new folder appears (Confidential or Private)

Transfer or move all the folders and files that you want to hide, and then go back one step

Double click on “SECRET” command again, a new dialogue box appears, just press ‘Y’ and click on enter.

The private/confidential folder will disappear, making all your files and documents secured.

To undo hiding, open the Secret folder command again and type the password. Click enter and the hidden folder will appear again.

[adinserter block=”7″]

As a technology lover you may like our daily important technology news series. It’s a playlist and you can retrieve the total day-wise videos. Please consider subscribing our YouTube channel:

Author: Technology and Beyond

Tagged : /

Having trouble with Window 10 password? These simple suggestions will help you!

There are now solutions to overcome the problems faced in Microsoft Windows 10 password. Microsoft has imposed strong security for PCs running windows 10. In spite of being convenient and good, it is also very risky. Even after careful installation of password in windows 10 most of the people tend to forget their password.

Forgetting password and trying to retrieve it, to access files and documents have become very common. There are several ways to recover the password of windows 10, but the whole process requires certain tools for installation and is also very time consuming.

If you feel that your password is difficult to type or remember, just change your password to something simple. Choosing a simple password will probably be risky, as online passwords are more prone to hacking than local ones. It should be complicated, long and difficult to guess. You should have alphabets that are lengthy, numbers that are complicated and use punctuations at intervals, so that, it becomes difficult in guessing. Make sure it is easy for you to remember the password. As soon as you come across such a password, visit microsoft.com. Log in to your account, and click on the avatar, which is in the upper right corner and select view account. Click to change password. Follow the instructions to change your password.

You will not require windows 10 password, while using a pin to log in. Although Microsoft password contains numbers, alphabets and punctuations, while pin contains only numbers, pin is still safe, as it does not travel to the Internet; hence there is no chance of hacking. Windows 10 pin is not restricted to 4 digits only; you can use as many digits you want. The longer the pin, the difficult it becomes to crack it. You can do this by selecting the ‘change account setting’ from the start menu and clicking on your avatar. Then select ‘sign-in’ options, click the add button in the pin section and follow the instructions given.

It is not necessary to have a Microsoft account to log in to windows 10. You will not be able to use certain features, like Cortana, if use a local account. To localize your account, you need to open ‘change account settings’ and select sign in with a local account instead.

[adinserter block=”7″]

As a technology lover you may like our daily important technology news series. It’s a playlist and you can retrieve the total day-wise videos. Please consider subscribing our YouTube channel:

Author: Technology and Beyond

Tagged : /

Here is the secret: Run Android Apps on any Chromebook

Google recently announced its very first developer preview with Android app for Chromebook. But, the chrome OS update is available only for Asus Chromebook flip. Devices like Google Chromebook Pixel and Acer Chromebook R11 can expect to get the update next, whereas other Chromebook users might have to for little more time.

Google’s latest timeline reveal that other Chromebooks will have to wait till late this year or early next year to get the play store built. However, if you’re impatient, there are ways you can run the Android apps on Chromebook. You will have to use the ARC Welder app to run Android on Chrome OS. Follow the steps given below to use Android apps on any Chromebook through ARC Welder.

Step 1

ARC-Welder-Chrome-app

Download the ARC wielder app from Chrome Web Store.

Step 2

Download the APK files of apps that you want to use on your Chromebook from APKMirror.com

Step 3

ARC-Welder-select-APK

Open the ARC Wielder app and then click on the Add your APK option.

Step 4

Select the APK files that you have downloaded.

Step 5

ARC-Welder-test-Android-app-on-Chromebook

Once the APK files are loaded in the app, you can choose from various options and customize your app experience. For example you can select the orientation (portrait or landscape), form factor (tablet, phone, maximized or full screen) and you can choose to give the app “Clipboard access” or not. Once done, click on “Test” to start the app.

Step 6

Android-apps-running-on-Chrome-OS-2

In case you have loaded ARC Welder app previously then you will be prompted to remove it before loading the new APK. Your app will then start up and you can use the app through mouse or touch if your Chromebook supports it. 

Important Points to Note

The ARC Welder app is built for the developers trying to enhance their Android apps for the Chrome OS, so do not assume great performance out of it. Nevertheless, if you are just considering using a few Android apps on your Chromebook, it’s not too shabby either. Having said that, if you consider using ARC Welder permanently, here are a few important points to be kept in mind:

  • Have patience as it many take a little longer time to load after you have clicked test.
  • According to developers, you should useTablet or Maximized as the form factor and Landscape as the screen orientation for best results. You can resize the window of an app, like you would do on a normal app and the interface will scale accordingly.
  • Not all the apps work! We tried out the APKs of most of the popular apps and only a few managed to play well with Chrome OS. This should get fixed with future Chrome OS updates, as Google starts integrating its Play Services.
  • You should choose downloading stable versions of apps, rather than trying out any beta or alpha builds of an app.

Now, you are ready to try out Android apps on your Chromebook.

[adinserter block=”7″]

As a technology lover you may like our daily important technology news series. It’s a playlist and you can retrieve the total day-wise videos. Please consider subscribing our YouTube channel:

Author: Technology and Beyond

Tagged : /

THIS is how you can use multiple WhatsApp, Facebook, Snapchat accounts on Android!

Twitter, Gmail, Instagram etc. allows you to login with multiple accounts and also switch with ease, whereas most of the other apps don’t. It becomes easy when you have a definite way to use multiple accounts, especially, for messaging apps like Whatsapp. We tend to use different numbers for work and personal usage and therefore, if we have an ability to distinguish our Whatsapp accounts as well, it would be great. Most of us love using different accounts especially for games. With an android app called Parallel Space, you can now login to multiple accounts using a single app in two iterations separately. This app also allows you install apps in incognito mode, which means that those apps will be only be available in Parallel Space app and no where else.

Here is how to use Parallel Space to run multiple iterations of an app.

Step 1

Parallel-Space-Welcome

Install the app “Parallel Space” from the Play Store. Open the app and you will see cool slides making you aware about the usefulness of the app. Tap on start.

Step 2

Parallel-Space-clone-apps

Clone apps page is your starting point from where you can make a selection of the app you want to run in Parallel Space. Mostly all the apps on your device are supported. For example, Select Whatsapp and it will be shown in Parallel Space with a message “Tap to open WhatsApp and sign in your other second account”.

Step 3

Parallel-Space-use-two-WhatsApp-accounts

Now you can easily sign into a second account on opening the app. You can easily add more apps and run multiple accounts.

Not only does Parallel Space allows you to run multiple iterations of an app, but also brings separate notifications of the cloned apps, this includes notifications from play services and play store as well. You have an option to block notifications from apps or put them in DND mode. Cloned apps can also be added to the home screen in order to use both your iterations of an app easily.

Parallel-Space-cloned-apps-notifications

Note: You can only add a single clone of the apps installed on your device, which means you can only use two accounts of an app. 

MultiDroid, claimed to be the first app virtualization system which powers Parallel Space Android and thus, it runs as its own entity in Android. Here are few more features it gives us along with cloning app.

[adinserter block=”7″]

Next Page For More

Tagged : /
Verified by ExactMetrics