5 Best Morning Yoga Rituals For A Happy, Healthy And Productive Day

5 Best Morning Rituals For A Happy, Healthy And Productive Day
Starting your day with a morning yoga routine is a great way to wake up your body and mind, and to set yourself up for a positive and productive day. Yoga can help to improve your flexibility, strength, balance, and coordination, and it can also help to reduce stress and anxiety.

Here are five of the best morning yoga rituals to help you start your day off right:

1. Set an intention for your day : Before you begin your yoga practice, take a few moments to close your eyes and set an intention for your day. What do you want to achieve today? How do you want to feel? Once you have set your intention, keep it in mind throughout your practice.

2. Start with some sun salutations : Sun salutations are a great way to warm up your body and to get your energy flowing. They are also a great way to connect with your breath and to move your body in a mindful way.

3. Include a variety of poses in your practice : When you are creating your morning yoga routine, try to include a variety of poses to target all of the different muscle groups in your body. You may also want to include some poses that are specifically designed to improve your flexibility, strength, balance, or coordination.

4. Listen to your body : It is important to listen to your body throughout your yoga practice. If you are feeling any pain, stop and rest. You should never force yourself into a pose.

5. End your practice with some relaxation poses : Once you have completed your yoga practice, take a few minutes to relax in a comfortable pose. This will help your body to integrate the benefits of your practice and to prepare for the day ahead.
Here is a sample morning yoga routine that you can try:

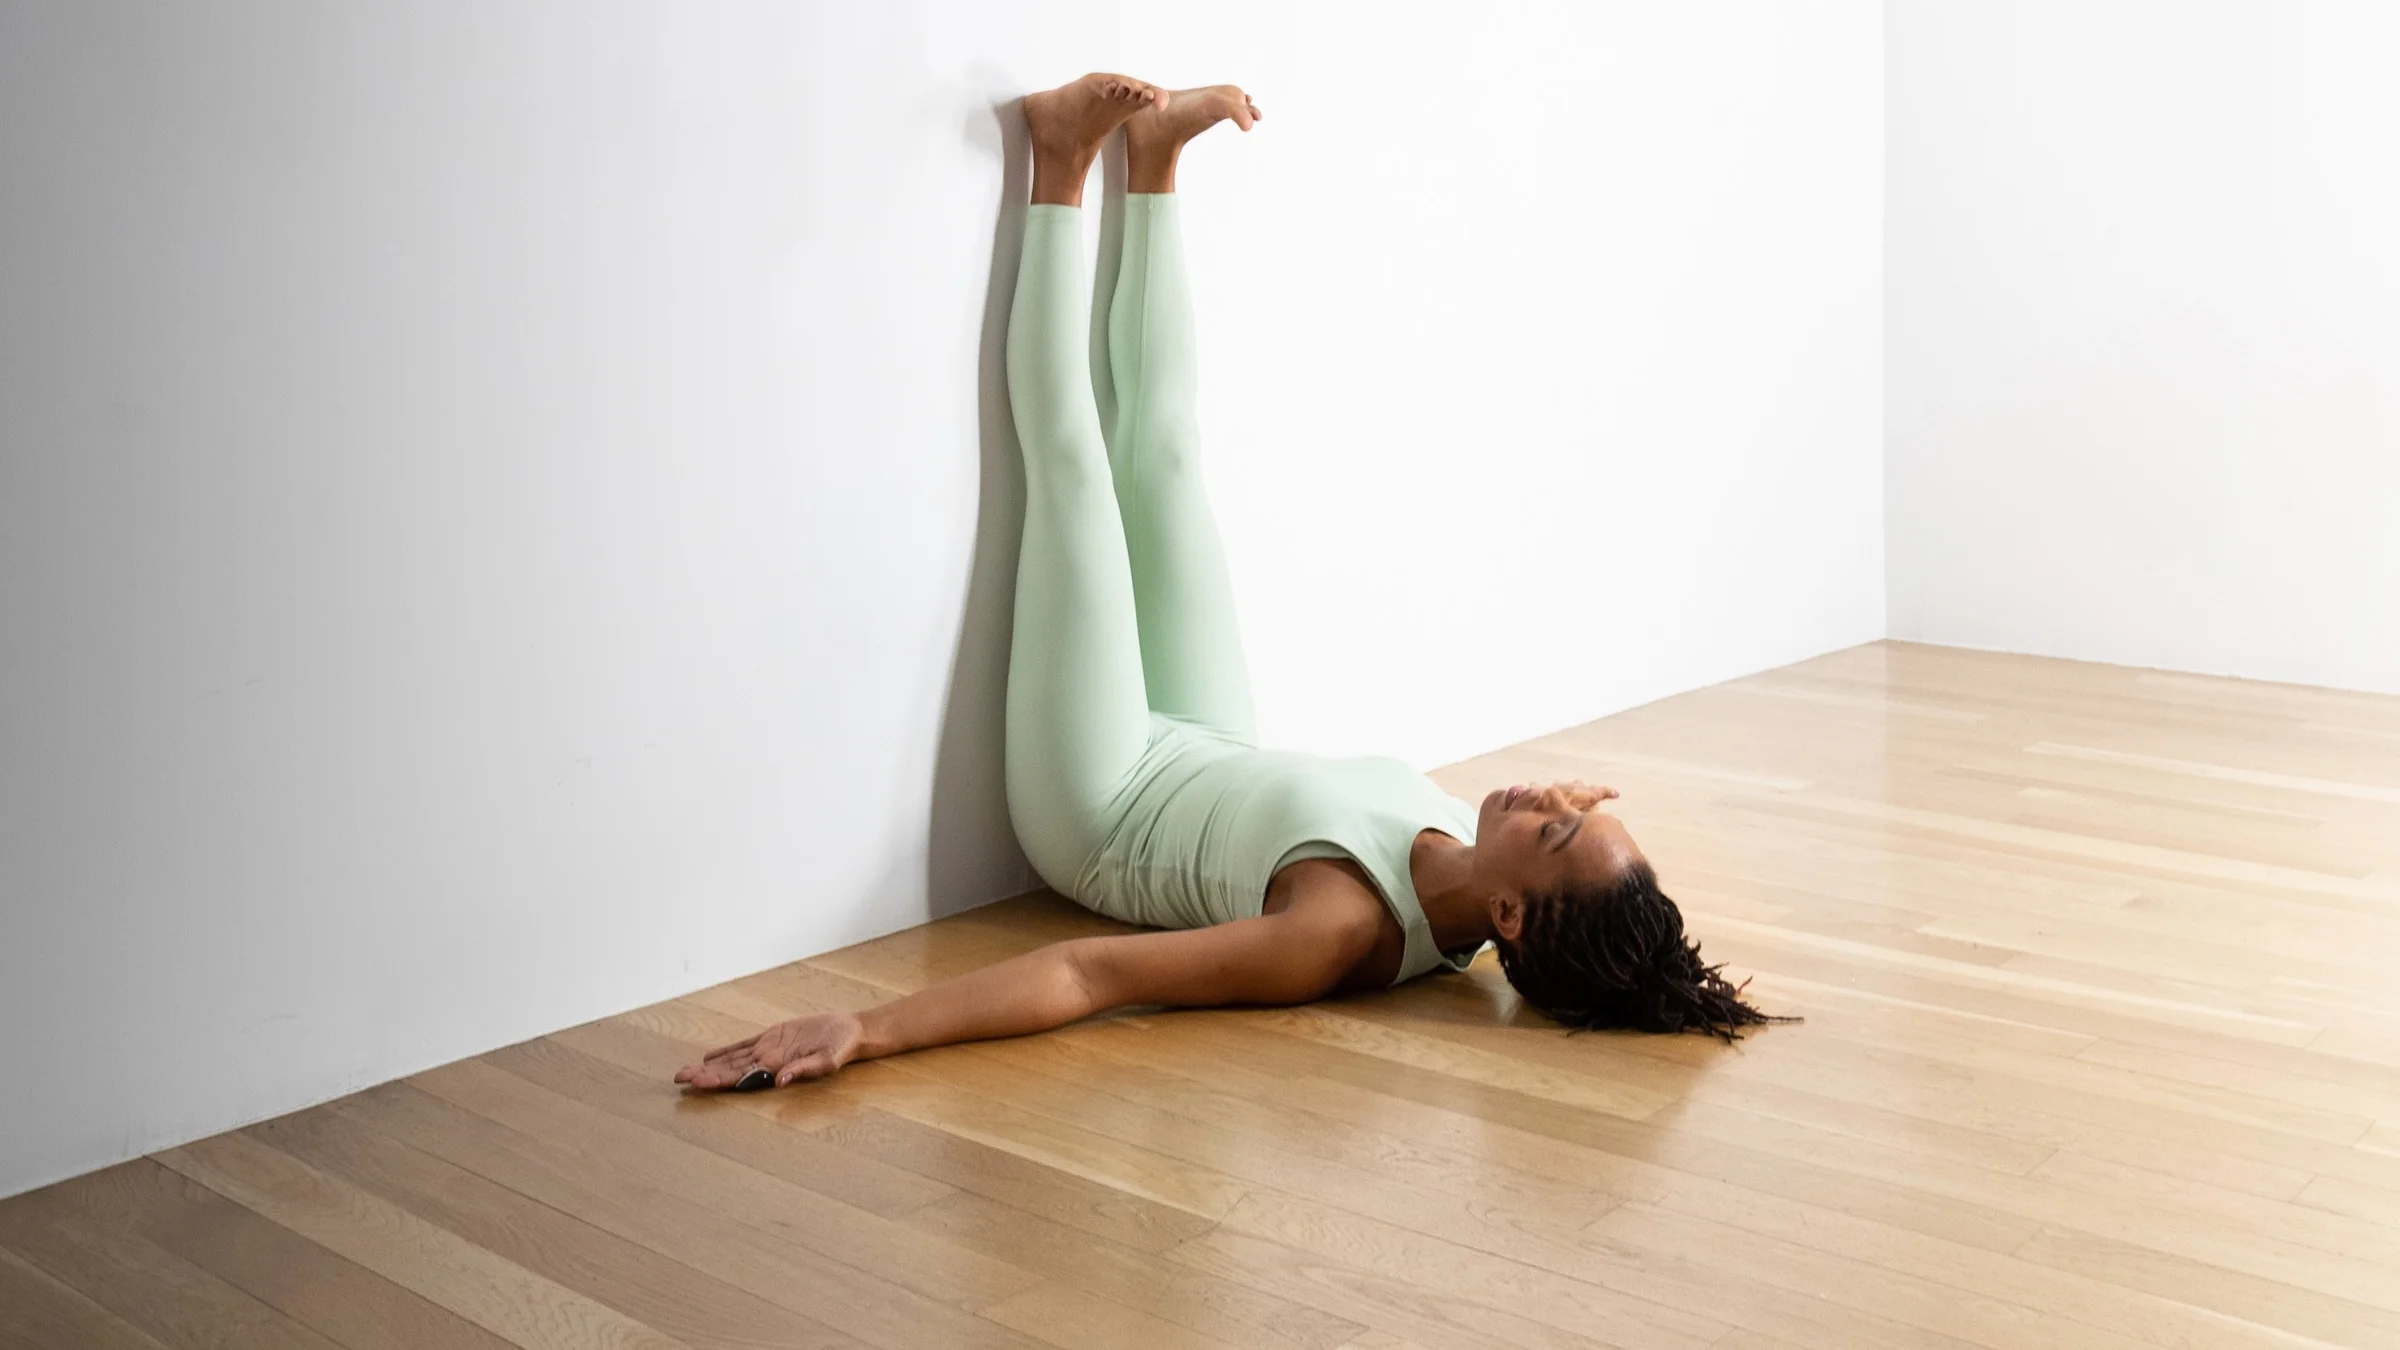
Start by lying on your back in corpse pose (Savasana). Close your eyes and take a few deep breaths.

Set an intention for your day. What do you want to achieve today? How do you want to feel?

Roll over to your right side and come into cat-cow pose (Marjaryasana-Bitilasana). Inhale as you arch your back and lift your head and tailbone. Exhale as you round your back and tuck your chin to your chest. Repeat 5-10 times.

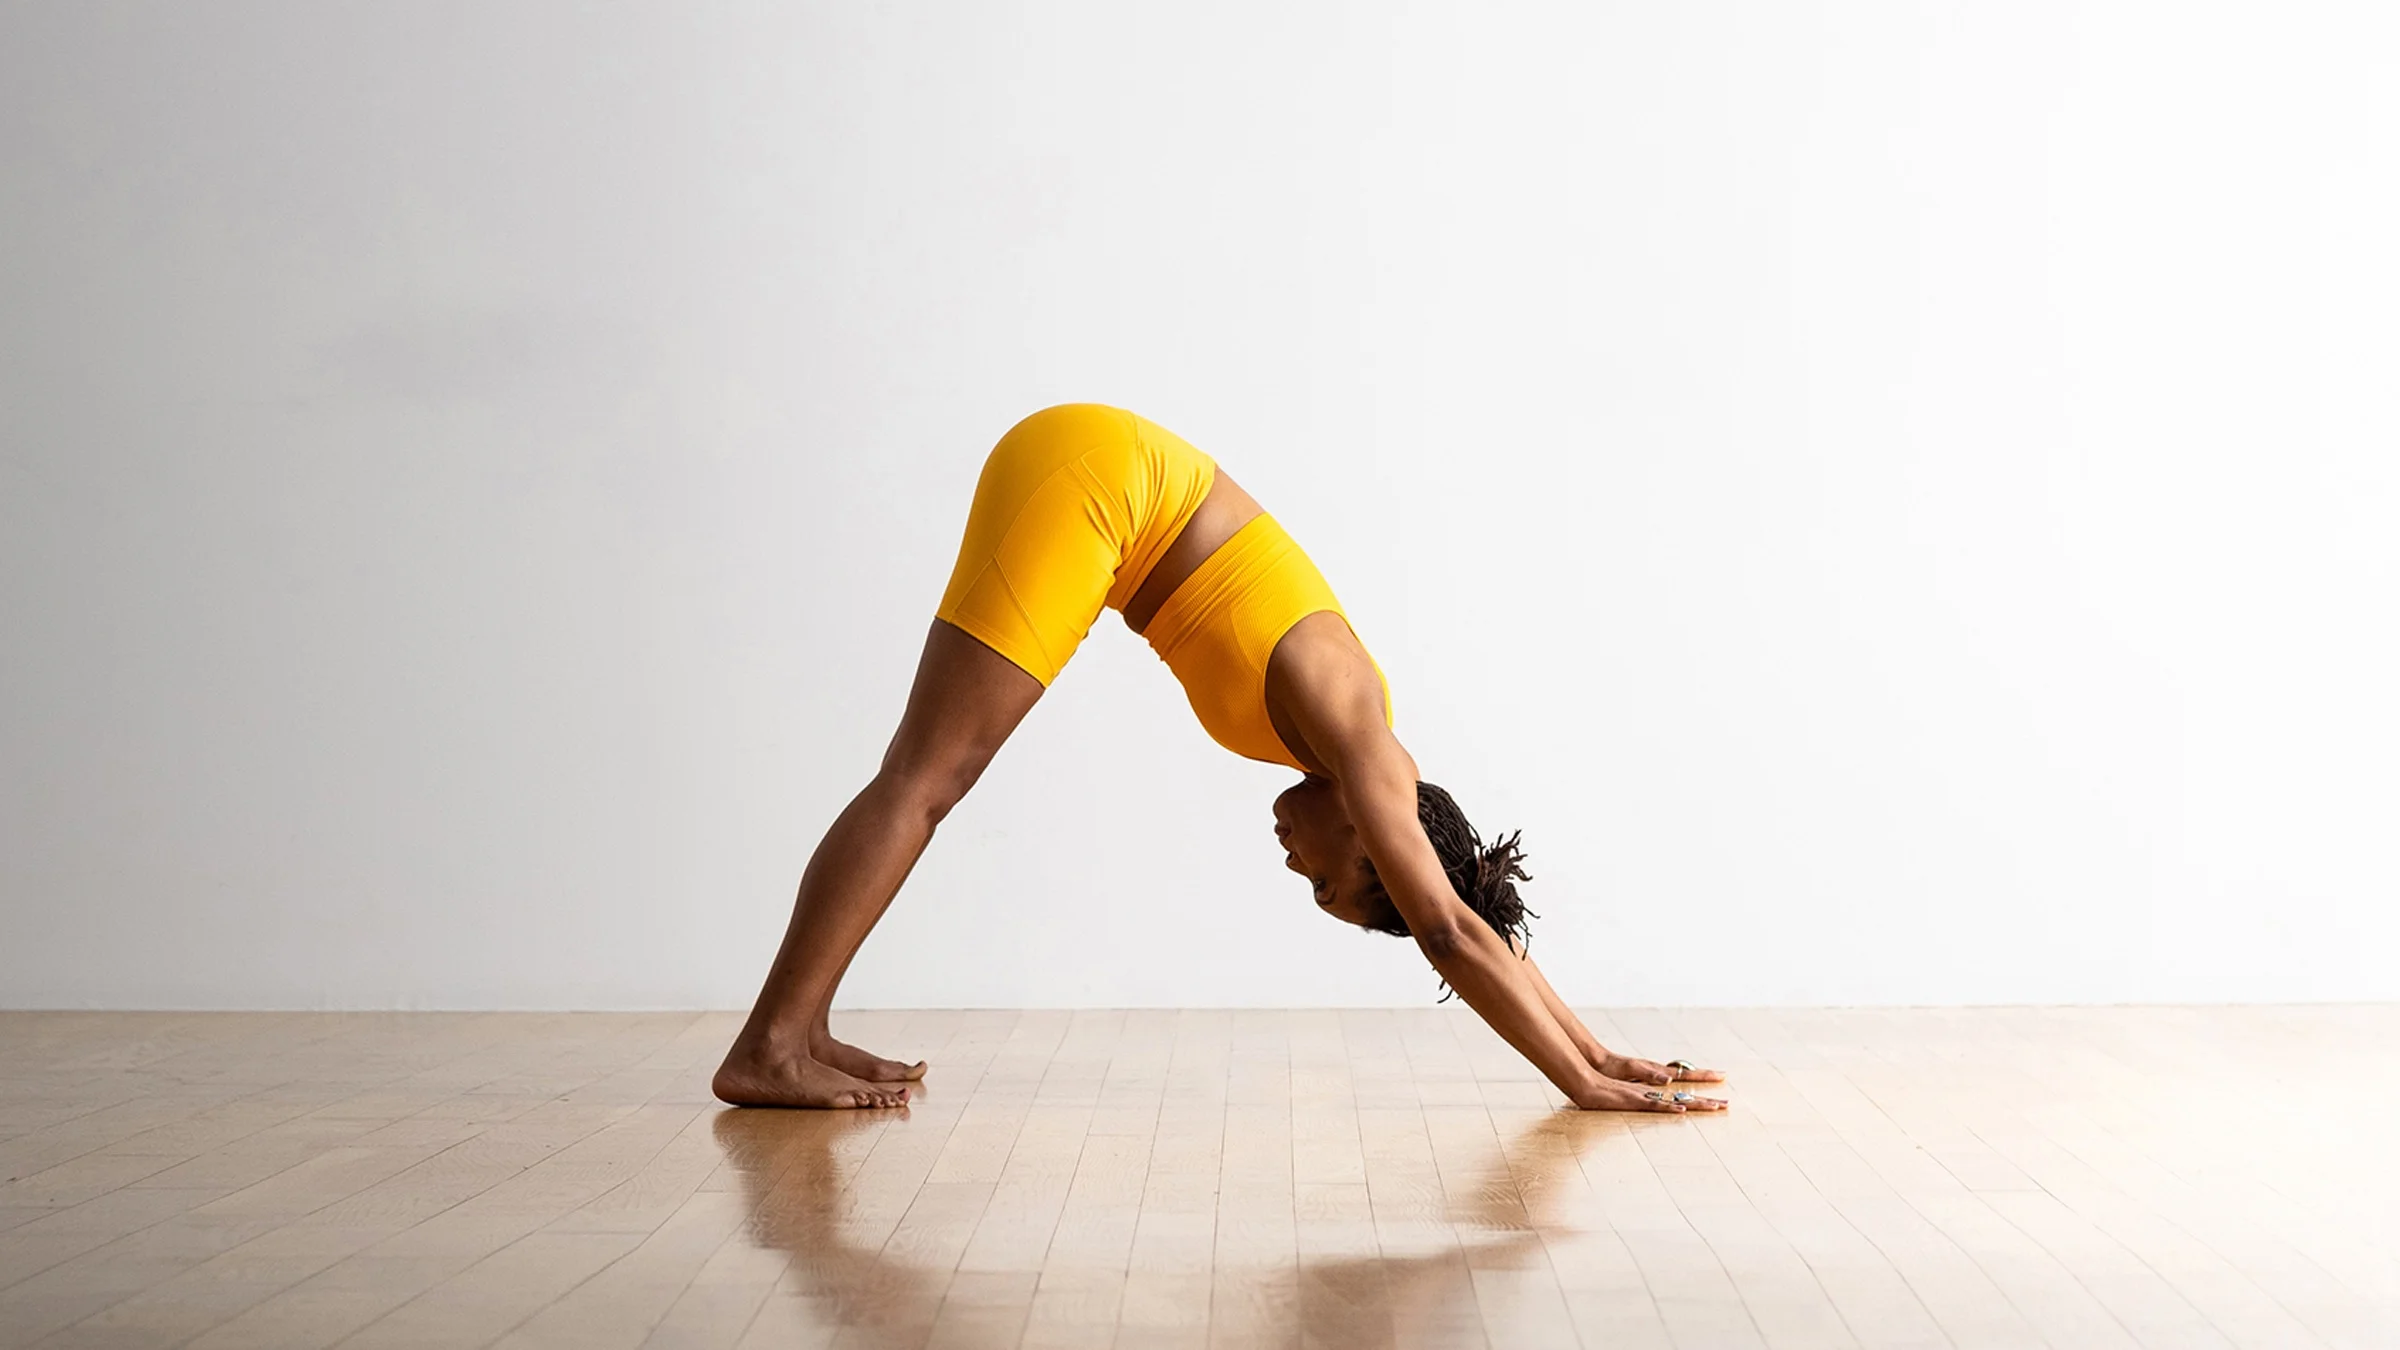
Come to your hands and knees and come into downward-facing dog (Adho Mukha Svanasana). Spread your fingers wide and press your palms into the floor. Tuck your toes under and lift your hips up and back. Hold for 5-10 breaths.

Step your right foot forward and come into warrior II pose (Virabhadrasana II). Bend your right knee and align your right thighbone parallel to the floor. Keep your left leg straight and your left foot turned out slightly. Raise your arms overhead, palms facing each other. Hold for 5-10 breaths. Repeat on the other side.

Come to your hands and knees and come into triangle pose (Trikonasana). Step your right foot back and align your right heel with the outside arch of your left foot. Turn your right foot out 90 degrees and turn your left foot in slightly. Raise your arms overhead, palms facing each other. Hold for 5-10 breaths. Repeat on the other side.

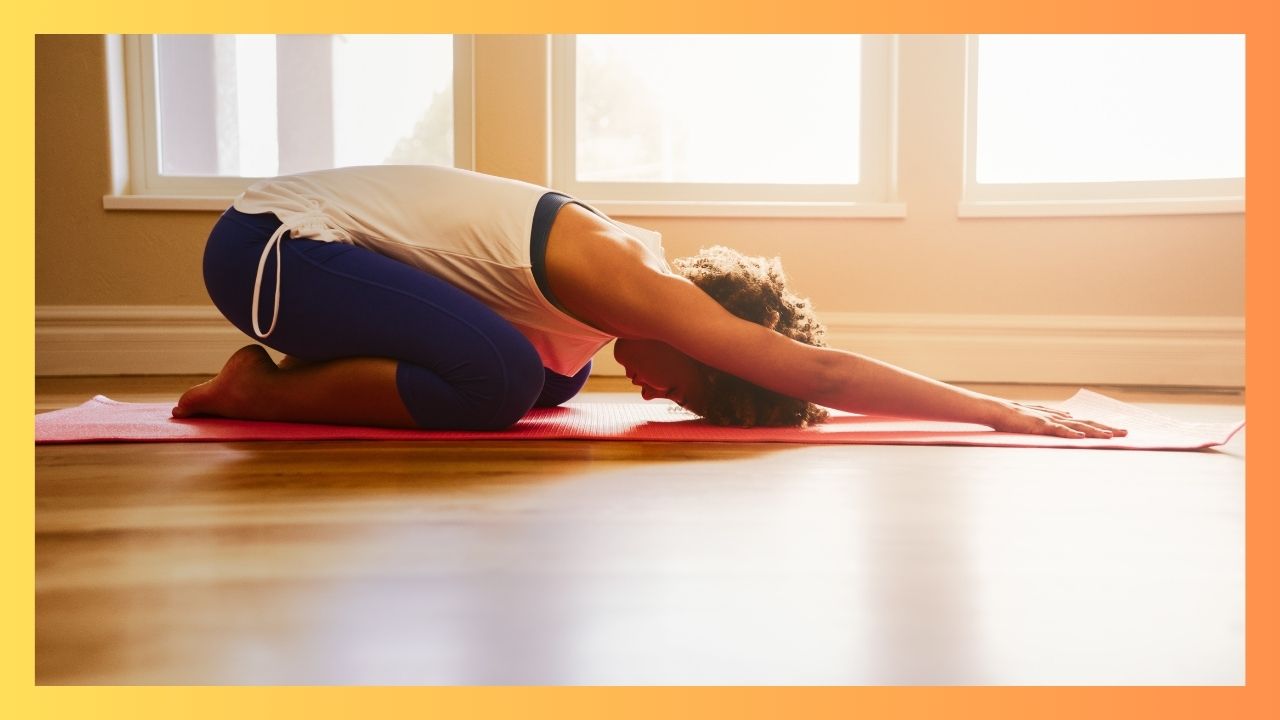
Come to your hands and knees and come into child’s pose (Balasana). Sit back on your heels and fold forward, resting your forehead on the floor. Arms can rest alongside your body or be extended out in front of you. Hold for 5-10 breaths.

Lie on your back in corpse pose (Savasana). Close your eyes and take a few deep breaths. Relax your body and mind. Rest for 5-10 minutes.

This is just a sample routine, and you can modify it to fit your own needs and abilities. You can also add or remove poses as you see fit. The most important thing is to find a routine that you enjoy and that makes you feel good.
Tagged : / / / /

Surya Namaskar: 8 Benefits of Doing It In The Morning On An Empty Stomach

Surya Namaskar: 8 Benefits of Doing It In The Morning On An Empty Stomach
Surya Namaskar, also known as Sun Salutation, is a sequence of 12 yoga poses that is performed in a flowing motion. It is a holistic practice that benefits both the body and the mind.

Surya Namaskar is best done in the morning, on an empty stomach. It is a great way to start your day, as it energizes your body and mind, and prepares you for the day ahead.

Here are 8 benefits of doing Surya Namaskar in the morning:

1. Improves flexibility

Surya Namaskar stretches and strengthens all of the major muscle groups in the body. This can help to improve your overall flexibility and range of motion.

2. Strengthens the muscles

Surya Namaskar is a great way to strengthen your muscles. The poses in Surya Namaskar work all of the major muscle groups in the body, including the core, legs, arms, and shoulders.

3. Improves cardiovascular health

Surya Namaskar is a cardiovascular workout. It increases your heart rate and blood circulation. This can help to improve your cardiovascular health and reduce your risk of heart disease.

4. Boosts the immune system

Surya Namaskar helps to boost the immune system. This is because it increases blood circulation and helps to remove toxins from the body.

5. Reduces stress

Surya Namaskar is a great way to reduce stress. It is a calming and meditative practice that can help to clear your mind and reduce anxiety.

6. Improves sleep quality

Surya Namaskar can help to improve sleep quality. This is because it helps to reduce stress and anxiety, and it also helps to regulate the body’s natural sleep-wake cycle.

7. Promotes weight loss

Surya Namaskar is a great way to burn calories and promote weight loss. It is a full-body workout that works all of the major muscle groups.

8. Improves digestion

Surya Namaskar helps to improve digestion. This is because it stimulates the digestive system and helps to move food through the digestive tract.

Tips for doing Surya Namaskar

Here are some tips for doing Surya Namaskar:

  • Start slowly and gradually increase the number of rounds that you do.
  • Listen to your body and don’t push yourself too hard.
  • Breathe deeply and evenly throughout the practice.
  • Focus on your breath and movement.
  • Don’t compare yourself to others. Everyone is at a different level of fitness.                                                                                                                                      Nowadays there is a trend of doing 108 Surya Namaskars and even more than that. According to Yogic Rules, Surya Namaskar should never be performed for more than 12 times at a time otherwise it leads to severe back issues in the long run.Surya Namaskar is a great way to start your day. It is a holistic practice that benefits both the body and the mind. If you are looking for a way to improve your overall health and well-being, I recommend trying Surya Namaskar.
Tagged : / / / /

5 Simple Yoga Asanas to Get Relief From Acidity and Gas

5 Simple Yoga Asanas to Get Relief From Acidity and Gas
oga is a mind-body practice that has been shown to be effective in relieving a variety of health conditions, including acidity and gas. Yoga poses can help to improve digestion, reduce inflammation, and relieve stress, all of which can contribute to acidity and gas.

Here are 5 yoga asanas that are especially beneficial for relieving acidity and gas:

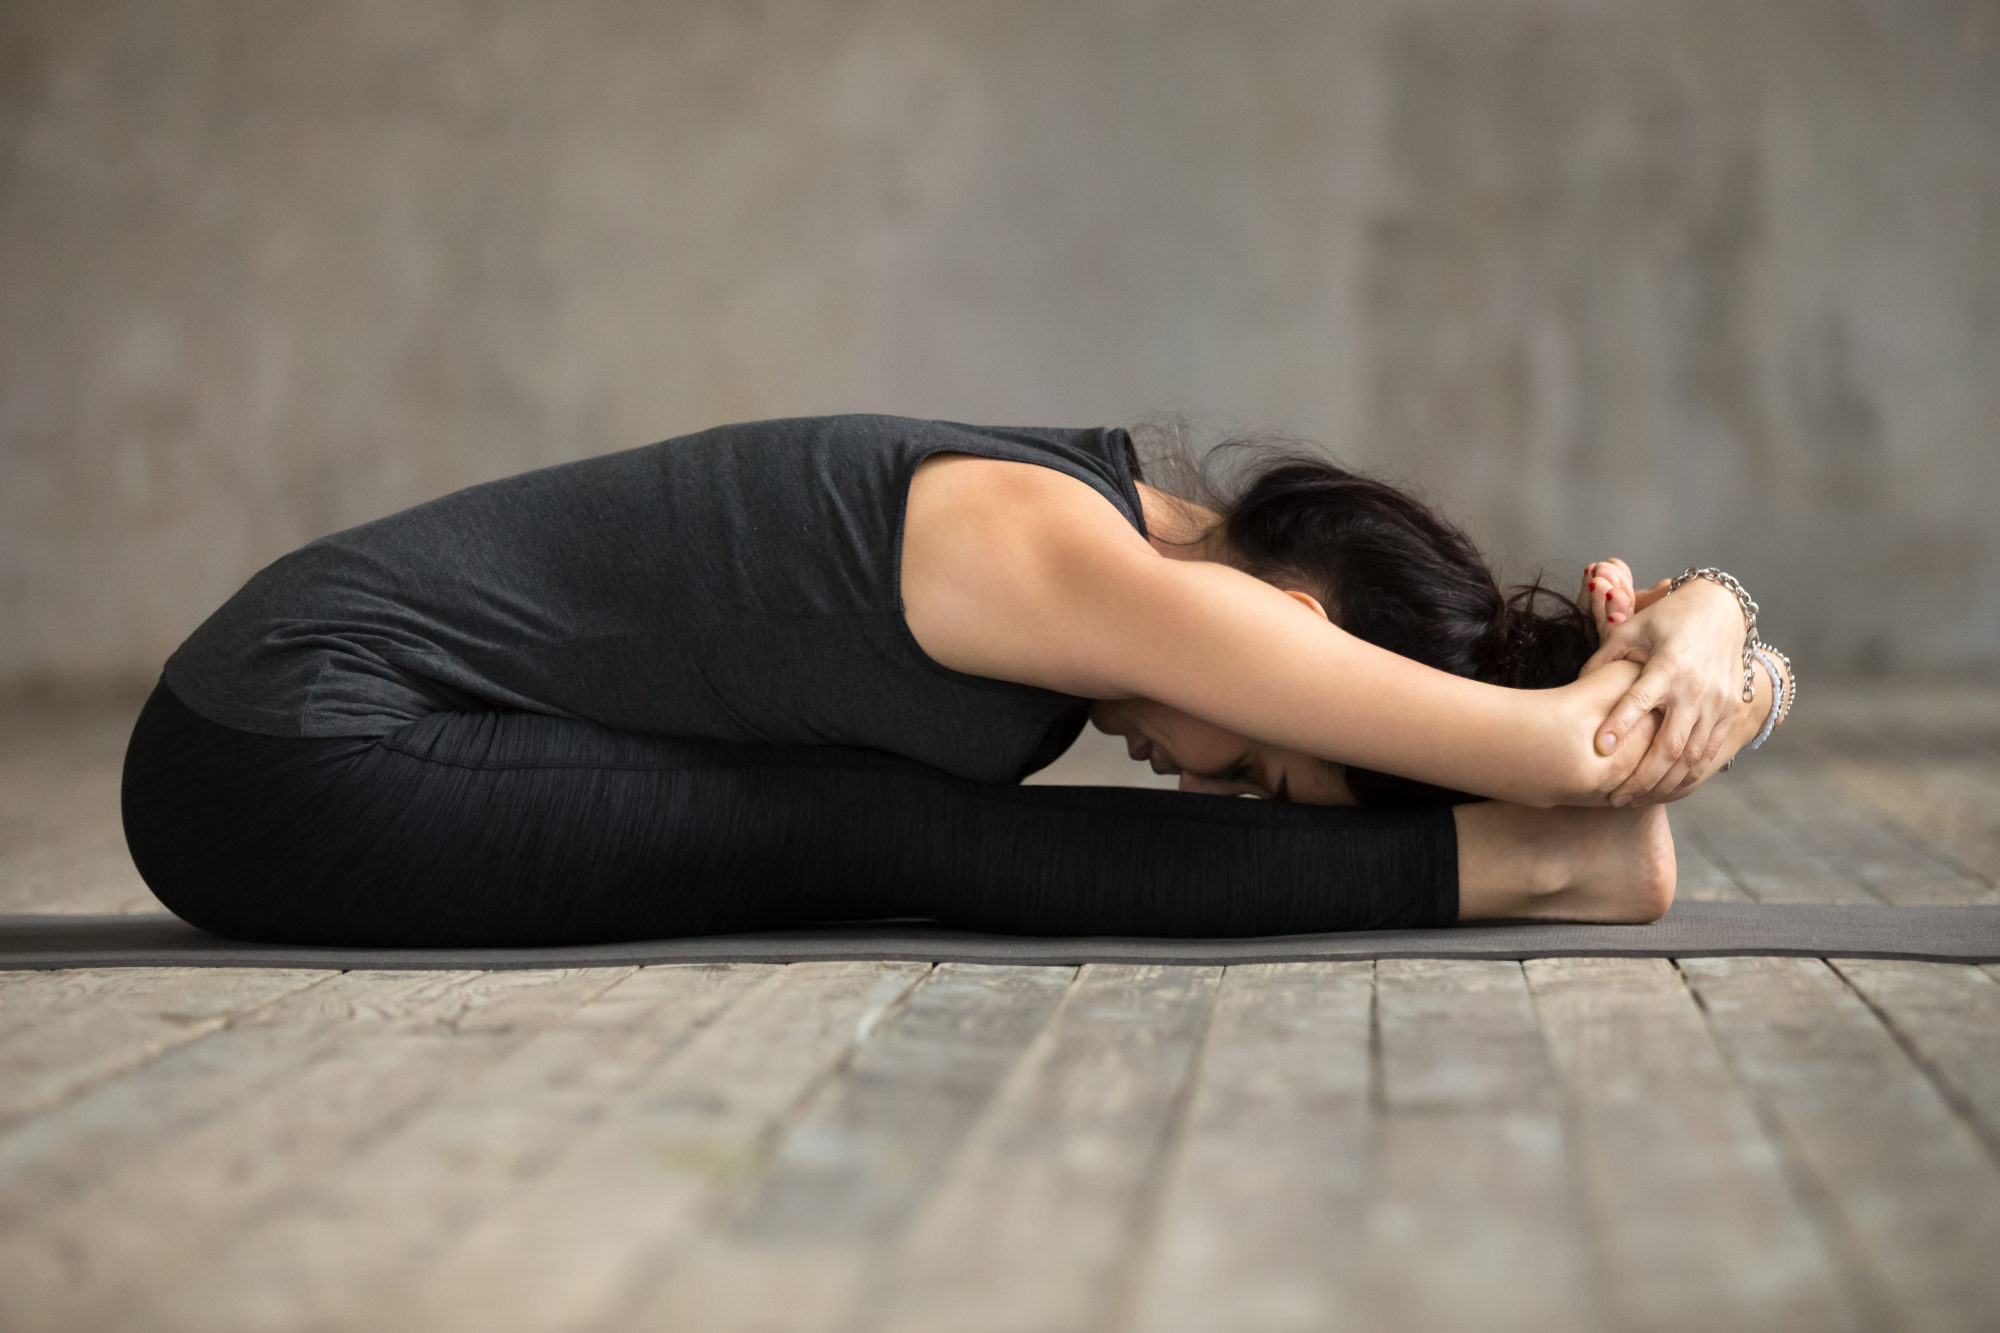
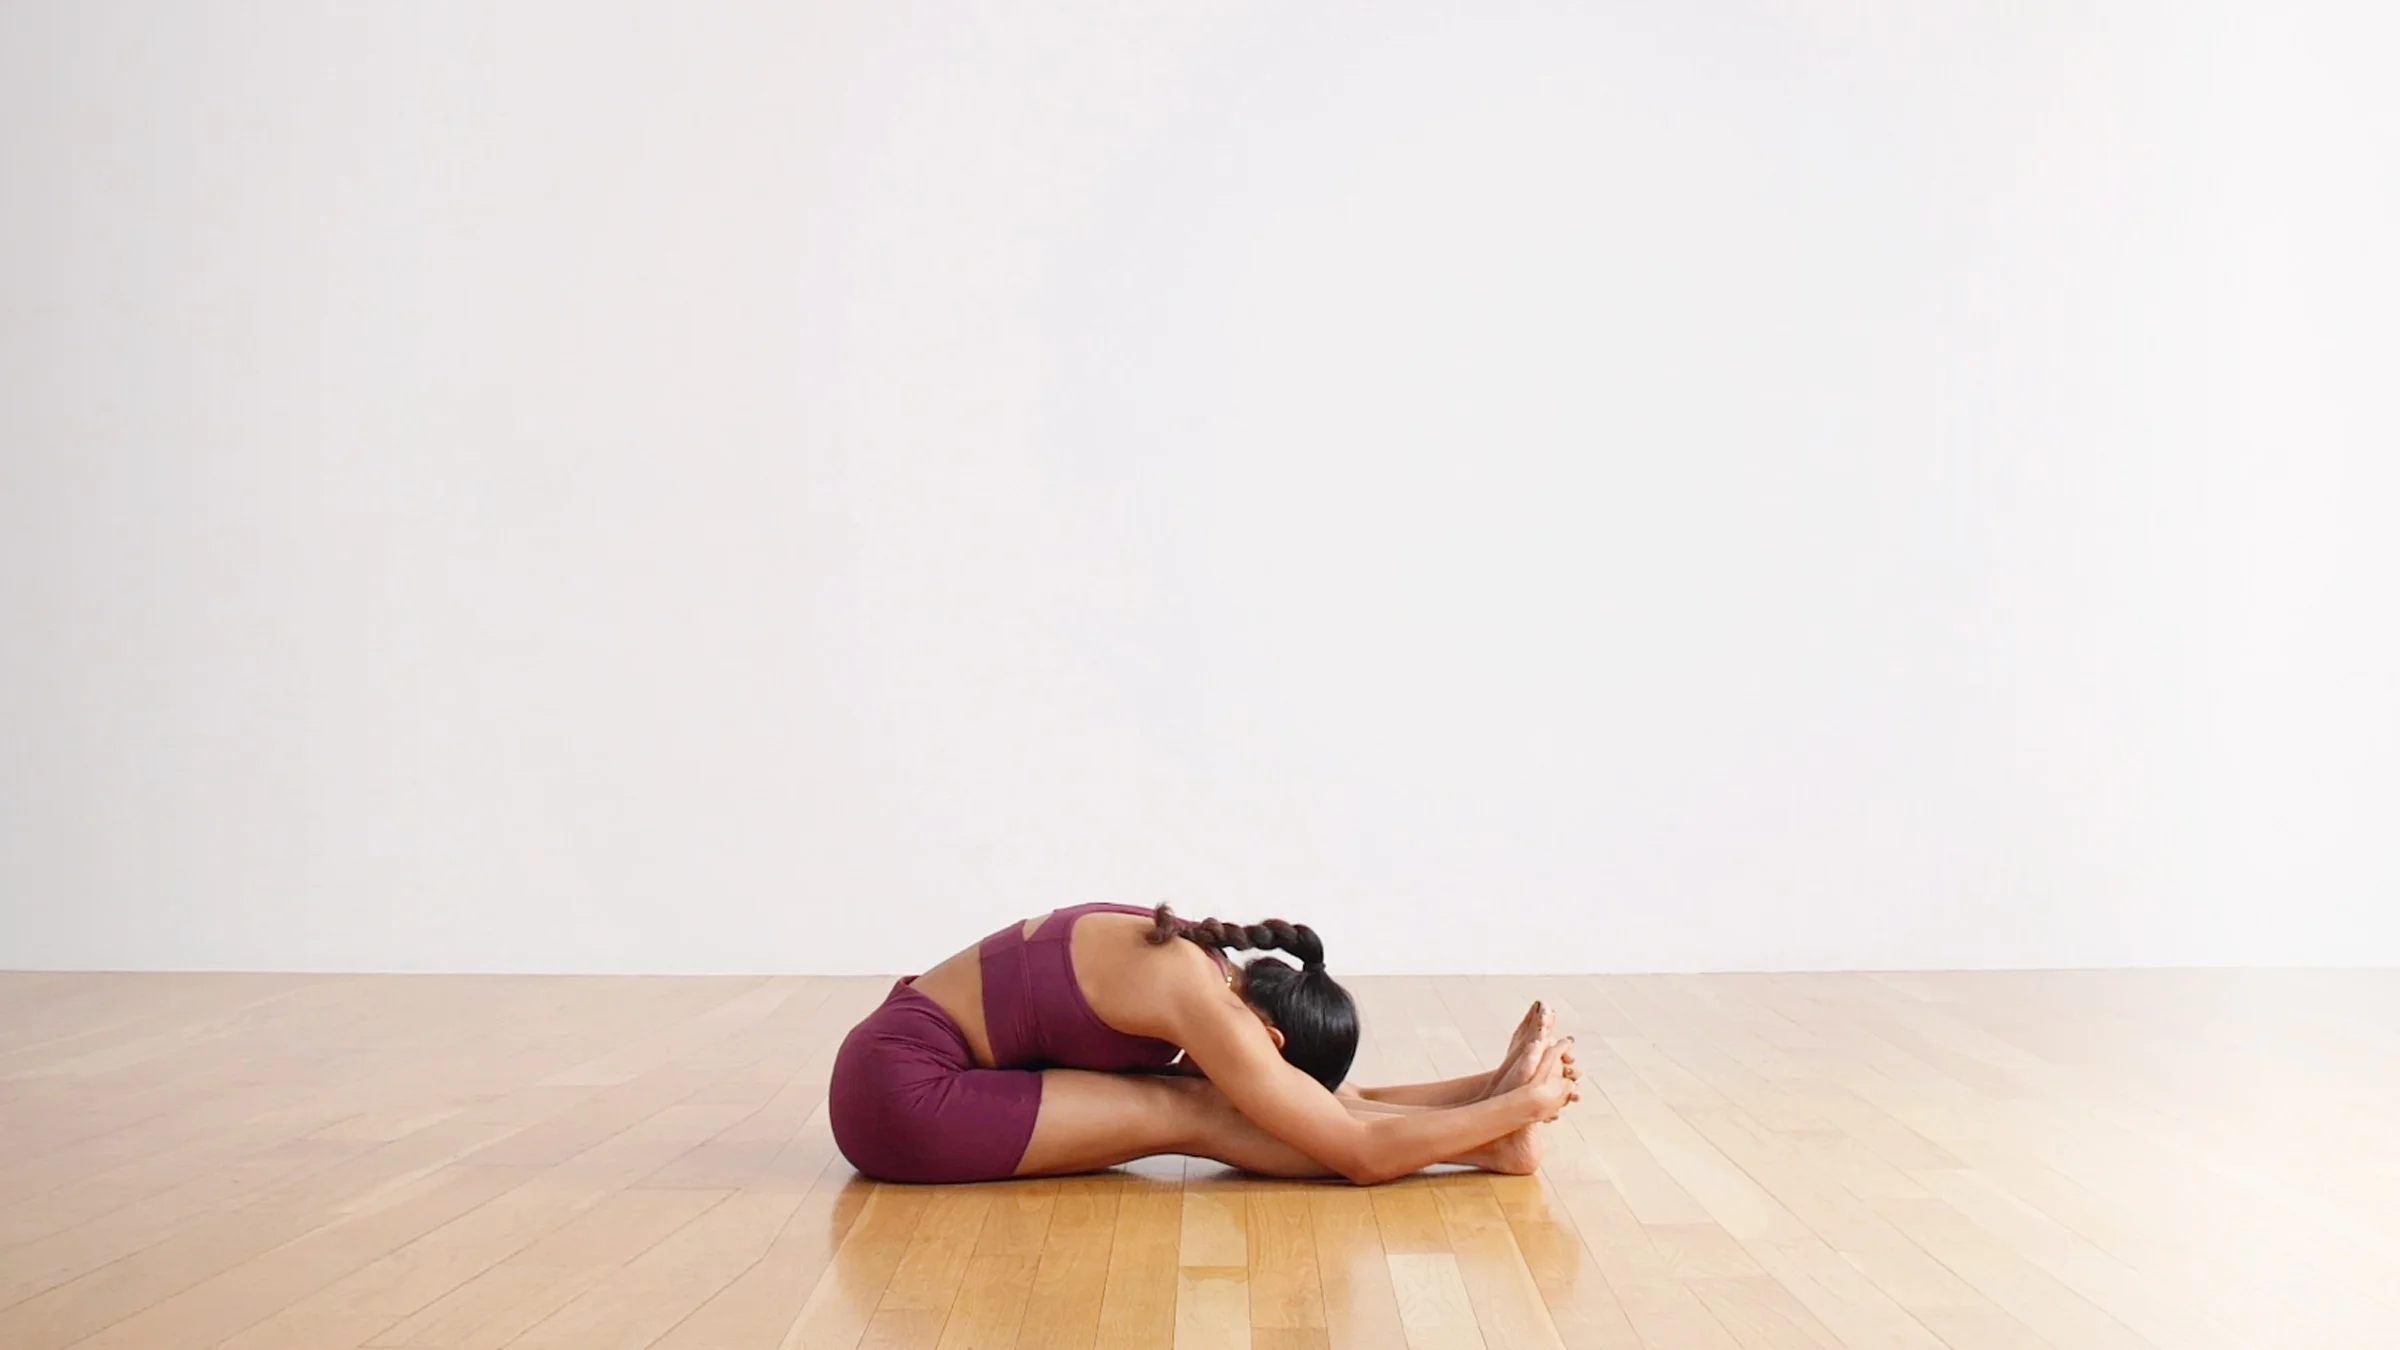
1. Paschimottanasana (seated forward bend): This pose helps to stretch the stomach and intestines, which can help to relieve gas and bloating. To do paschimottanasana, sit on the floor with your legs extended in front of you. Bend forward from the hips, keeping your back straight, and reach for your toes. Hold for 30 seconds.

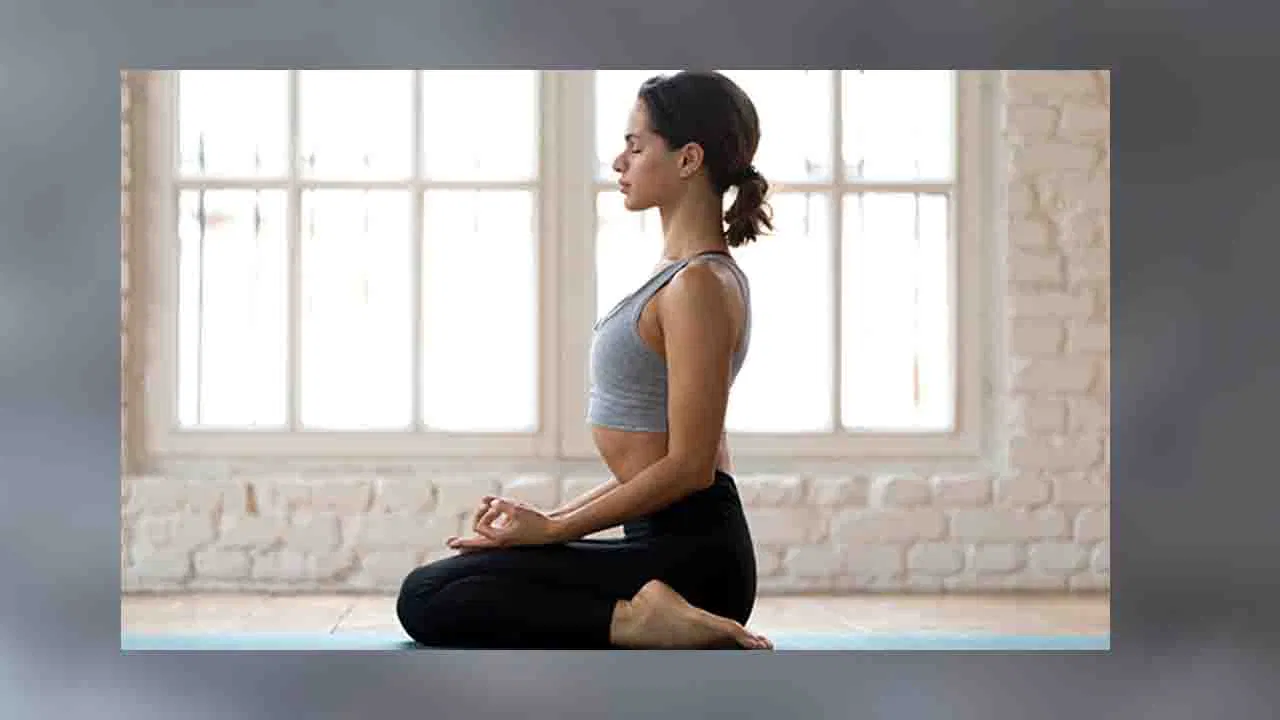
2. Vajrasana (thunderbolt pose): This pose helps to improve digestion and relieve gas. To do vajrasana, sit on the floor with your knees bent and your feet flat on the floor. Bring the soles of your feet together and rest your knees on the sides of your body. Hold for 5 minutes.

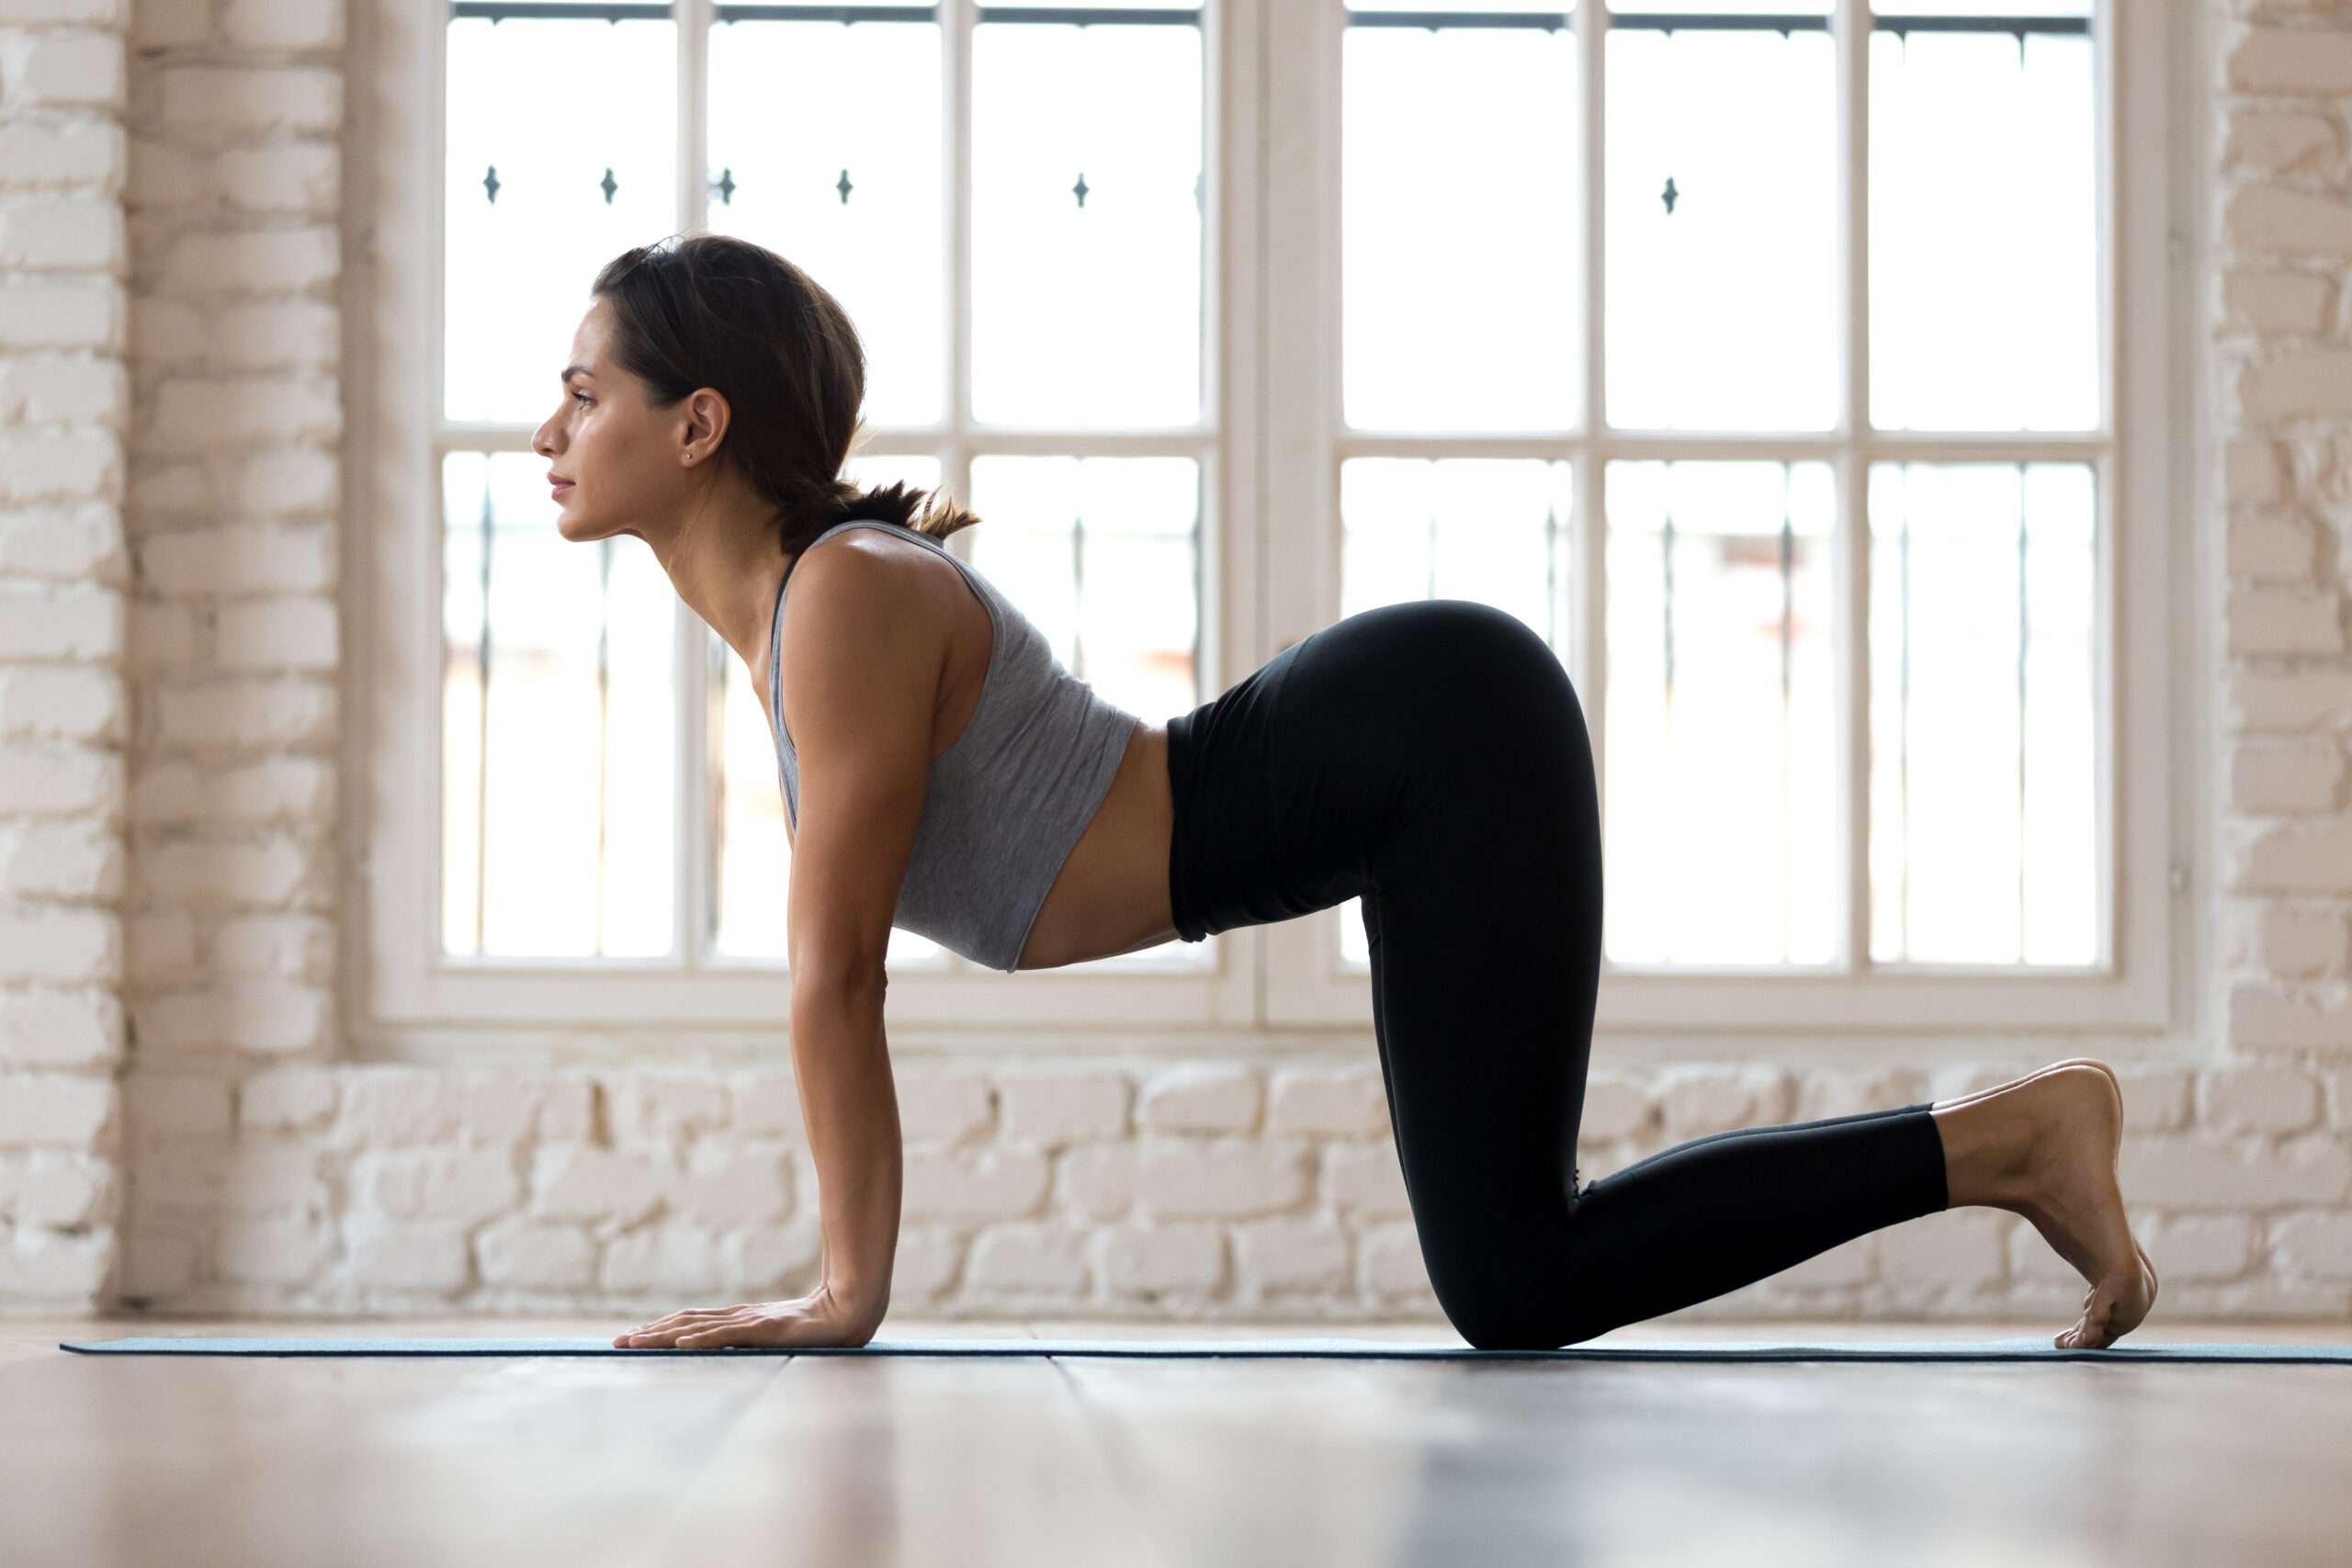
3. Cat cow pose (Marjaryasana and Bitilasana): This pose helps to massage the abdominal organs and improve digestion. To do cat cow pose, start on your hands and knees. As you inhale, arch your back and look up. As you exhale, round your back and tuck your chin to your chest. Repeat 5-10 times.

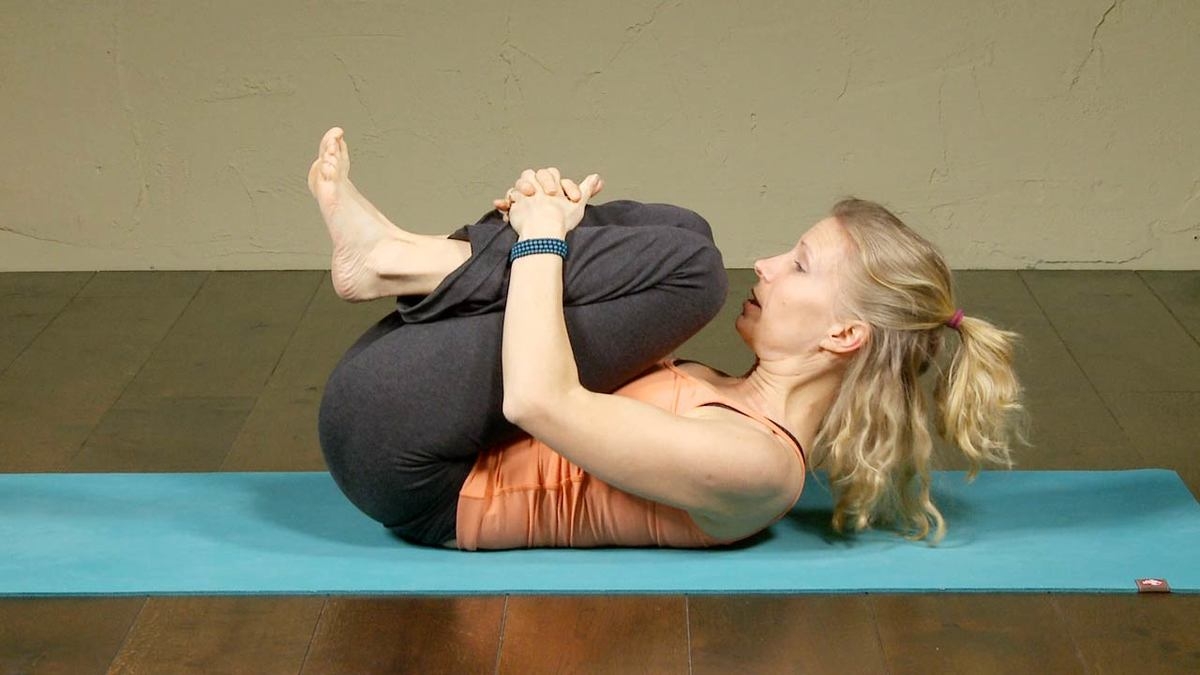
4. Pawanmuktasana (wind-relieving pose): This pose helps to improve digestion and relieve gas. To do pawanmuktasana, lie on your back with your knees bent and your feet flat on the floor. Bring your right knee to your chest and wrap your arms around it. Hold for 30 seconds, then repeat on the other side.

5. Kapalbhati Pranayama (skull shining breath): This breathing technique helps to reduce acidity and gas by stimulating the digestive system. To do kapalbhati pranayama, sit in a comfortable position with your spine erect. Close your mouth and inhale deeply through your nose. Then, exhale forcefully through your nose, making a sound like a sigh. Repeat for 5-10 minutes.

It is important to note that these are just a few of the many yoga poses that can help to relieve acidity and gas. If you are experiencing these symptoms, it is always best to consult with a doctor or a yoga instructor to get personalized advice.

Here are some tips for doing yoga for acidity and gas:

  • Start with gentle poses and gradually increase the intensity as you become more comfortable.
  • Listen to your body and avoid doing any poses that cause pain.
  • Hold each pose for a few breaths, and focus on your breath as you practice.
  • Practice yoga regularly to get the most benefits.
    Yoga can be a helpful way to relieve acidity and gas. By practicing these poses regularly, you can improve your digestion and reduce your symptoms.
Tagged : / / / / / /

4 Simple Yoga Poses to Relieve Constipation

4 Simple Yoga Poses to Relieve Constipation
Constipation is a common problem that affects people of all ages. It can be caused by a variety of factors, including dehydration, lack of fiber in the diet, and certain medications. Yoga can be a helpful way to relieve constipation by improving digestion and stimulating the bowels. Here are 4 Simple Asanas that you can do easily in order to relieve constipation:

1. Child’s Pose (Balasana)


This pose is a gentle way to stretch the lower back and abdomen. To do Child’s Pose, start on your hands and knees. Then, slowly lower your hips down to your heels and rest your forehead on the ground. You can keep your arms extended in front of you or rest them on the ground beside your body. Hold the pose for 5-10 breaths.

2. Supine Twist (Supta Matsyendrasana)


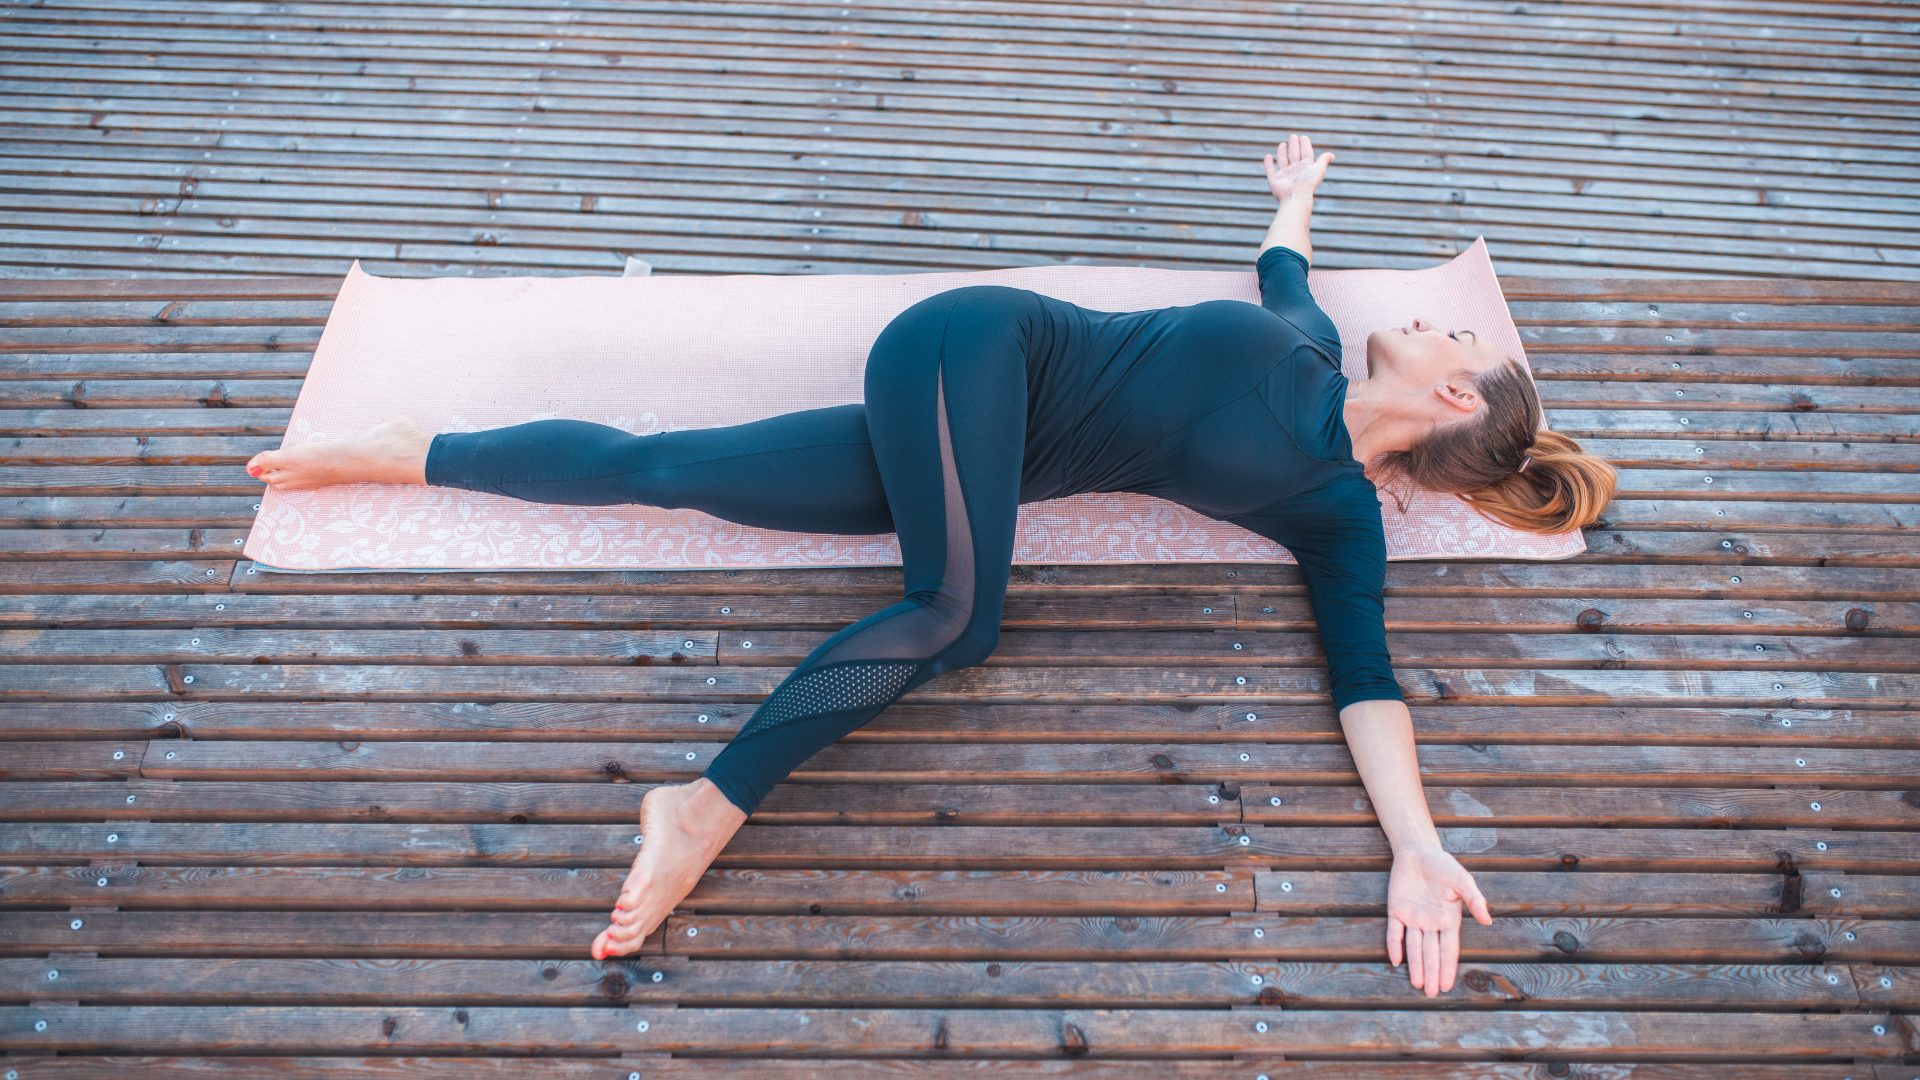
This pose is a gentle twist that can help to relieve gas and bloating. To do Supine Twist, lie on your back with your knees bent and your feet flat on the floor. Bring your right knee up towards your chest and cross it over your left leg. Place your right hand on the floor behind you for support. Gently twist your upper body to the left, bringing your left arm up towards the ceiling. Hold the pose for 5-10 breaths, then repeat on the other side.

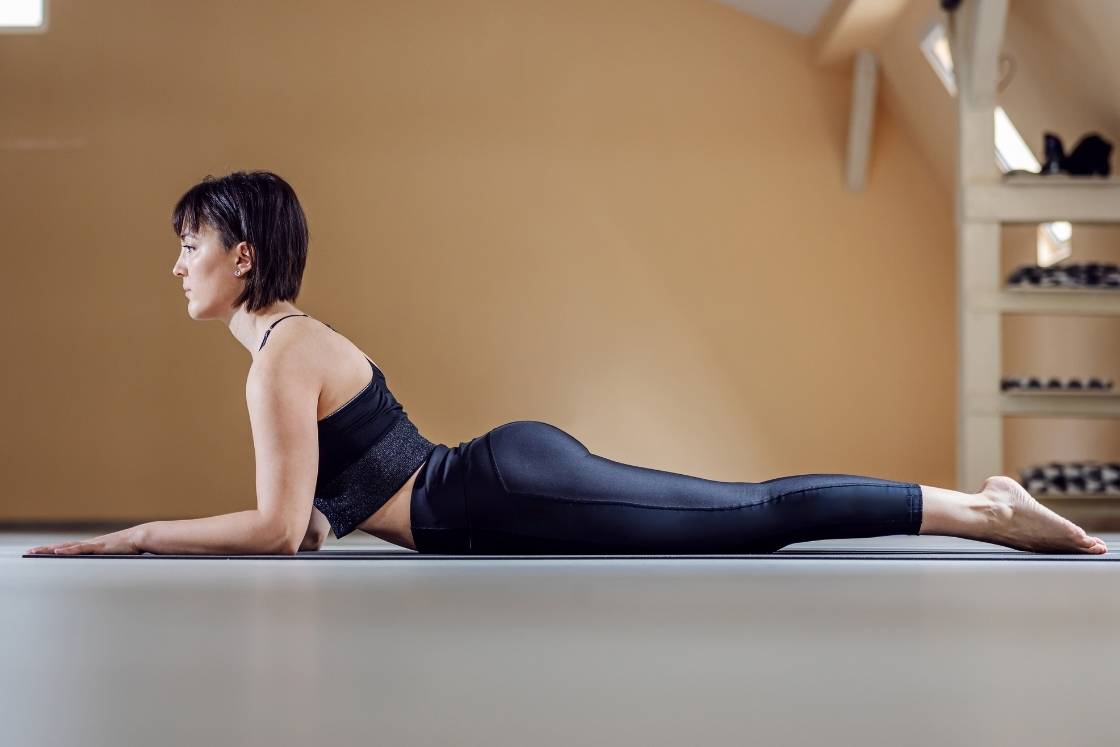
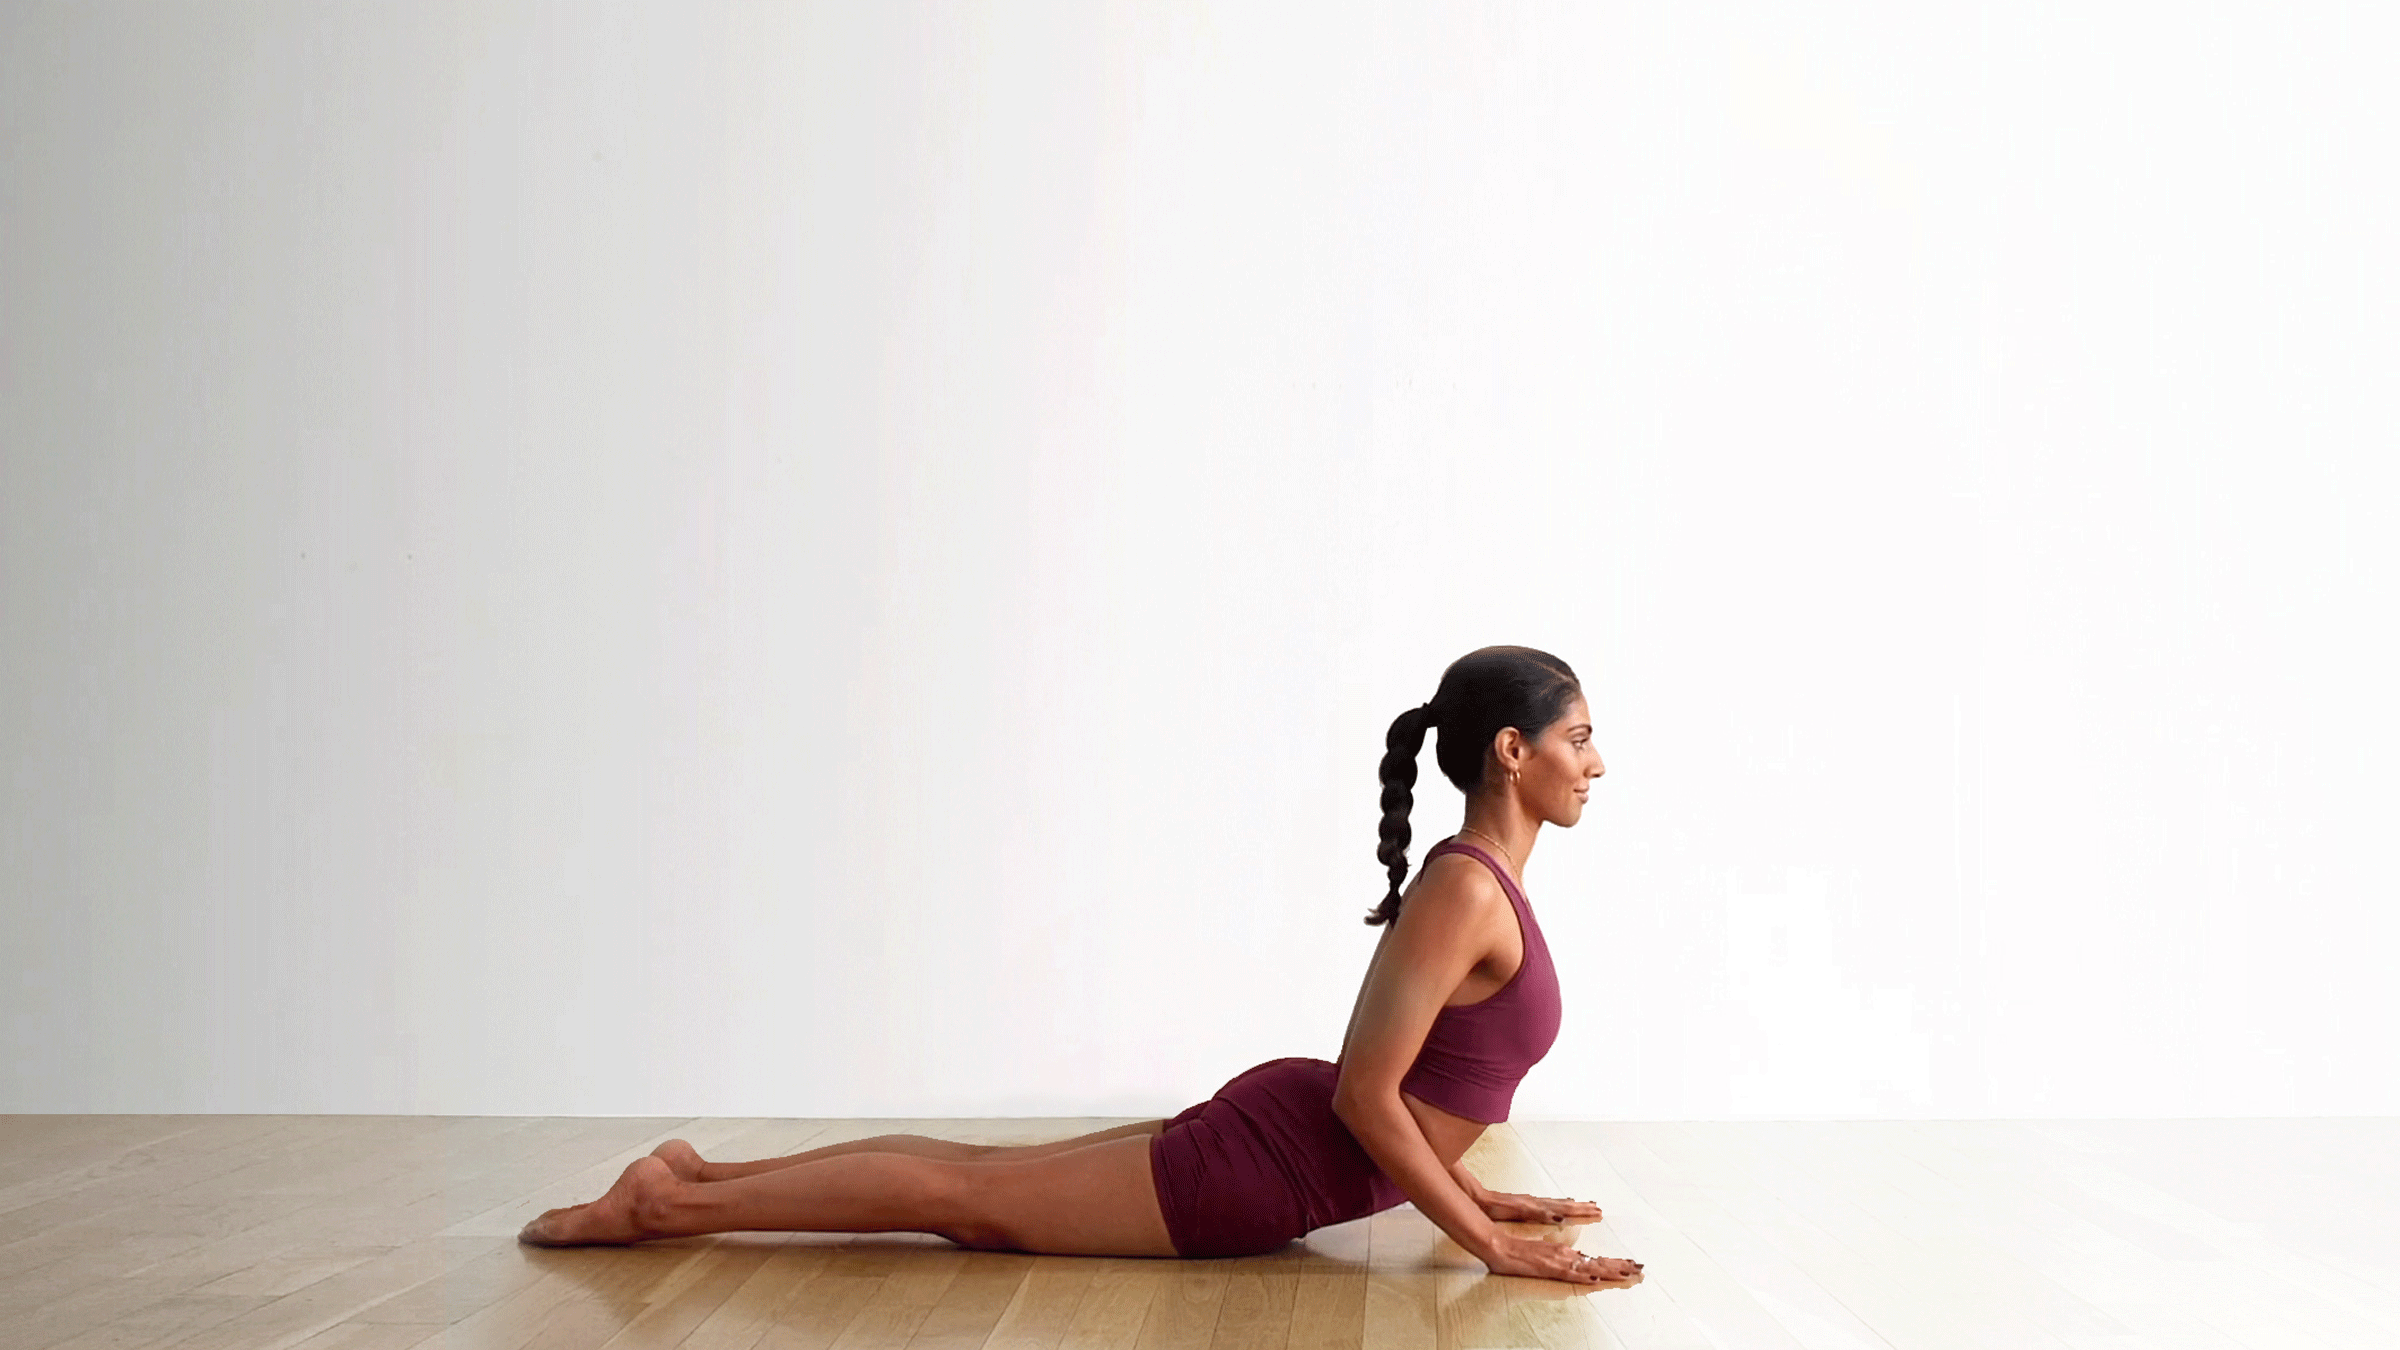
3. Cobra Pose (Bhujangasana)


This pose is a backbend that can help to massage the abdominal organs. To do Cobra Pose, start on your hands and knees. Then, slowly arch your back and lift your chest off the ground. Keep your shoulders down and your neck long. Hold the pose for 5-10 breaths.

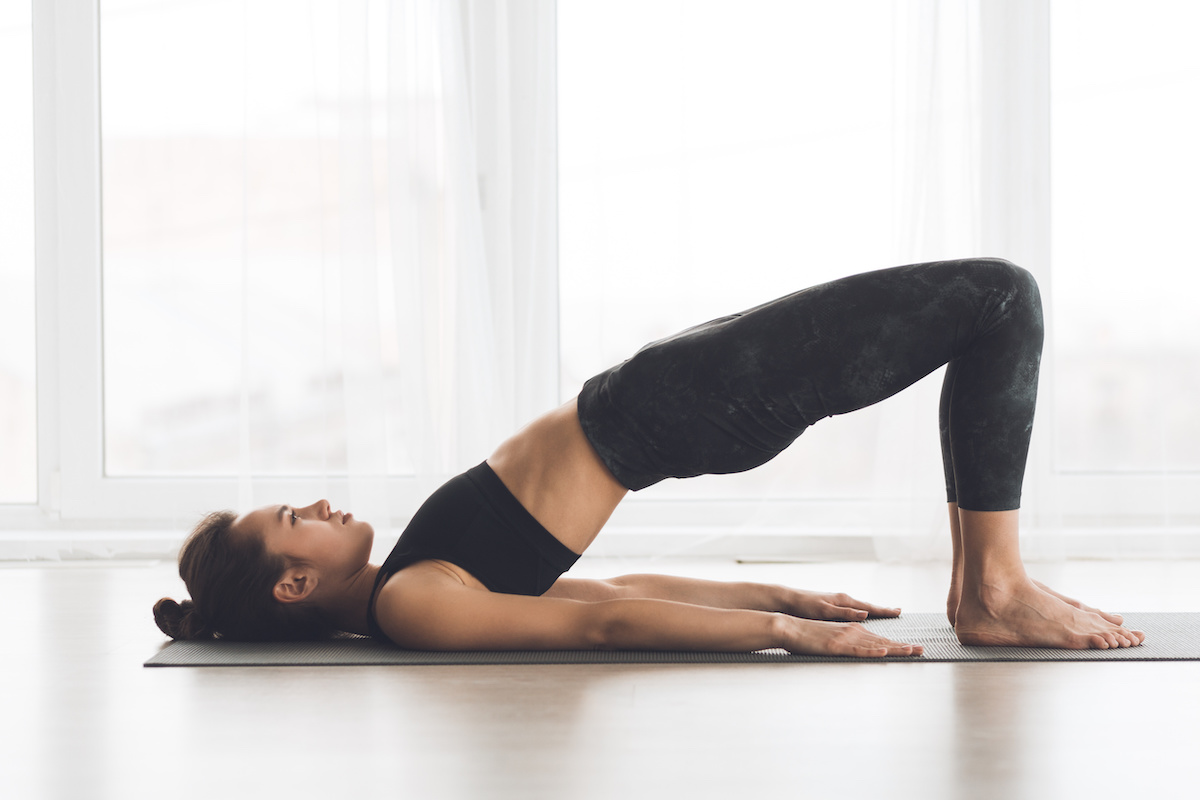
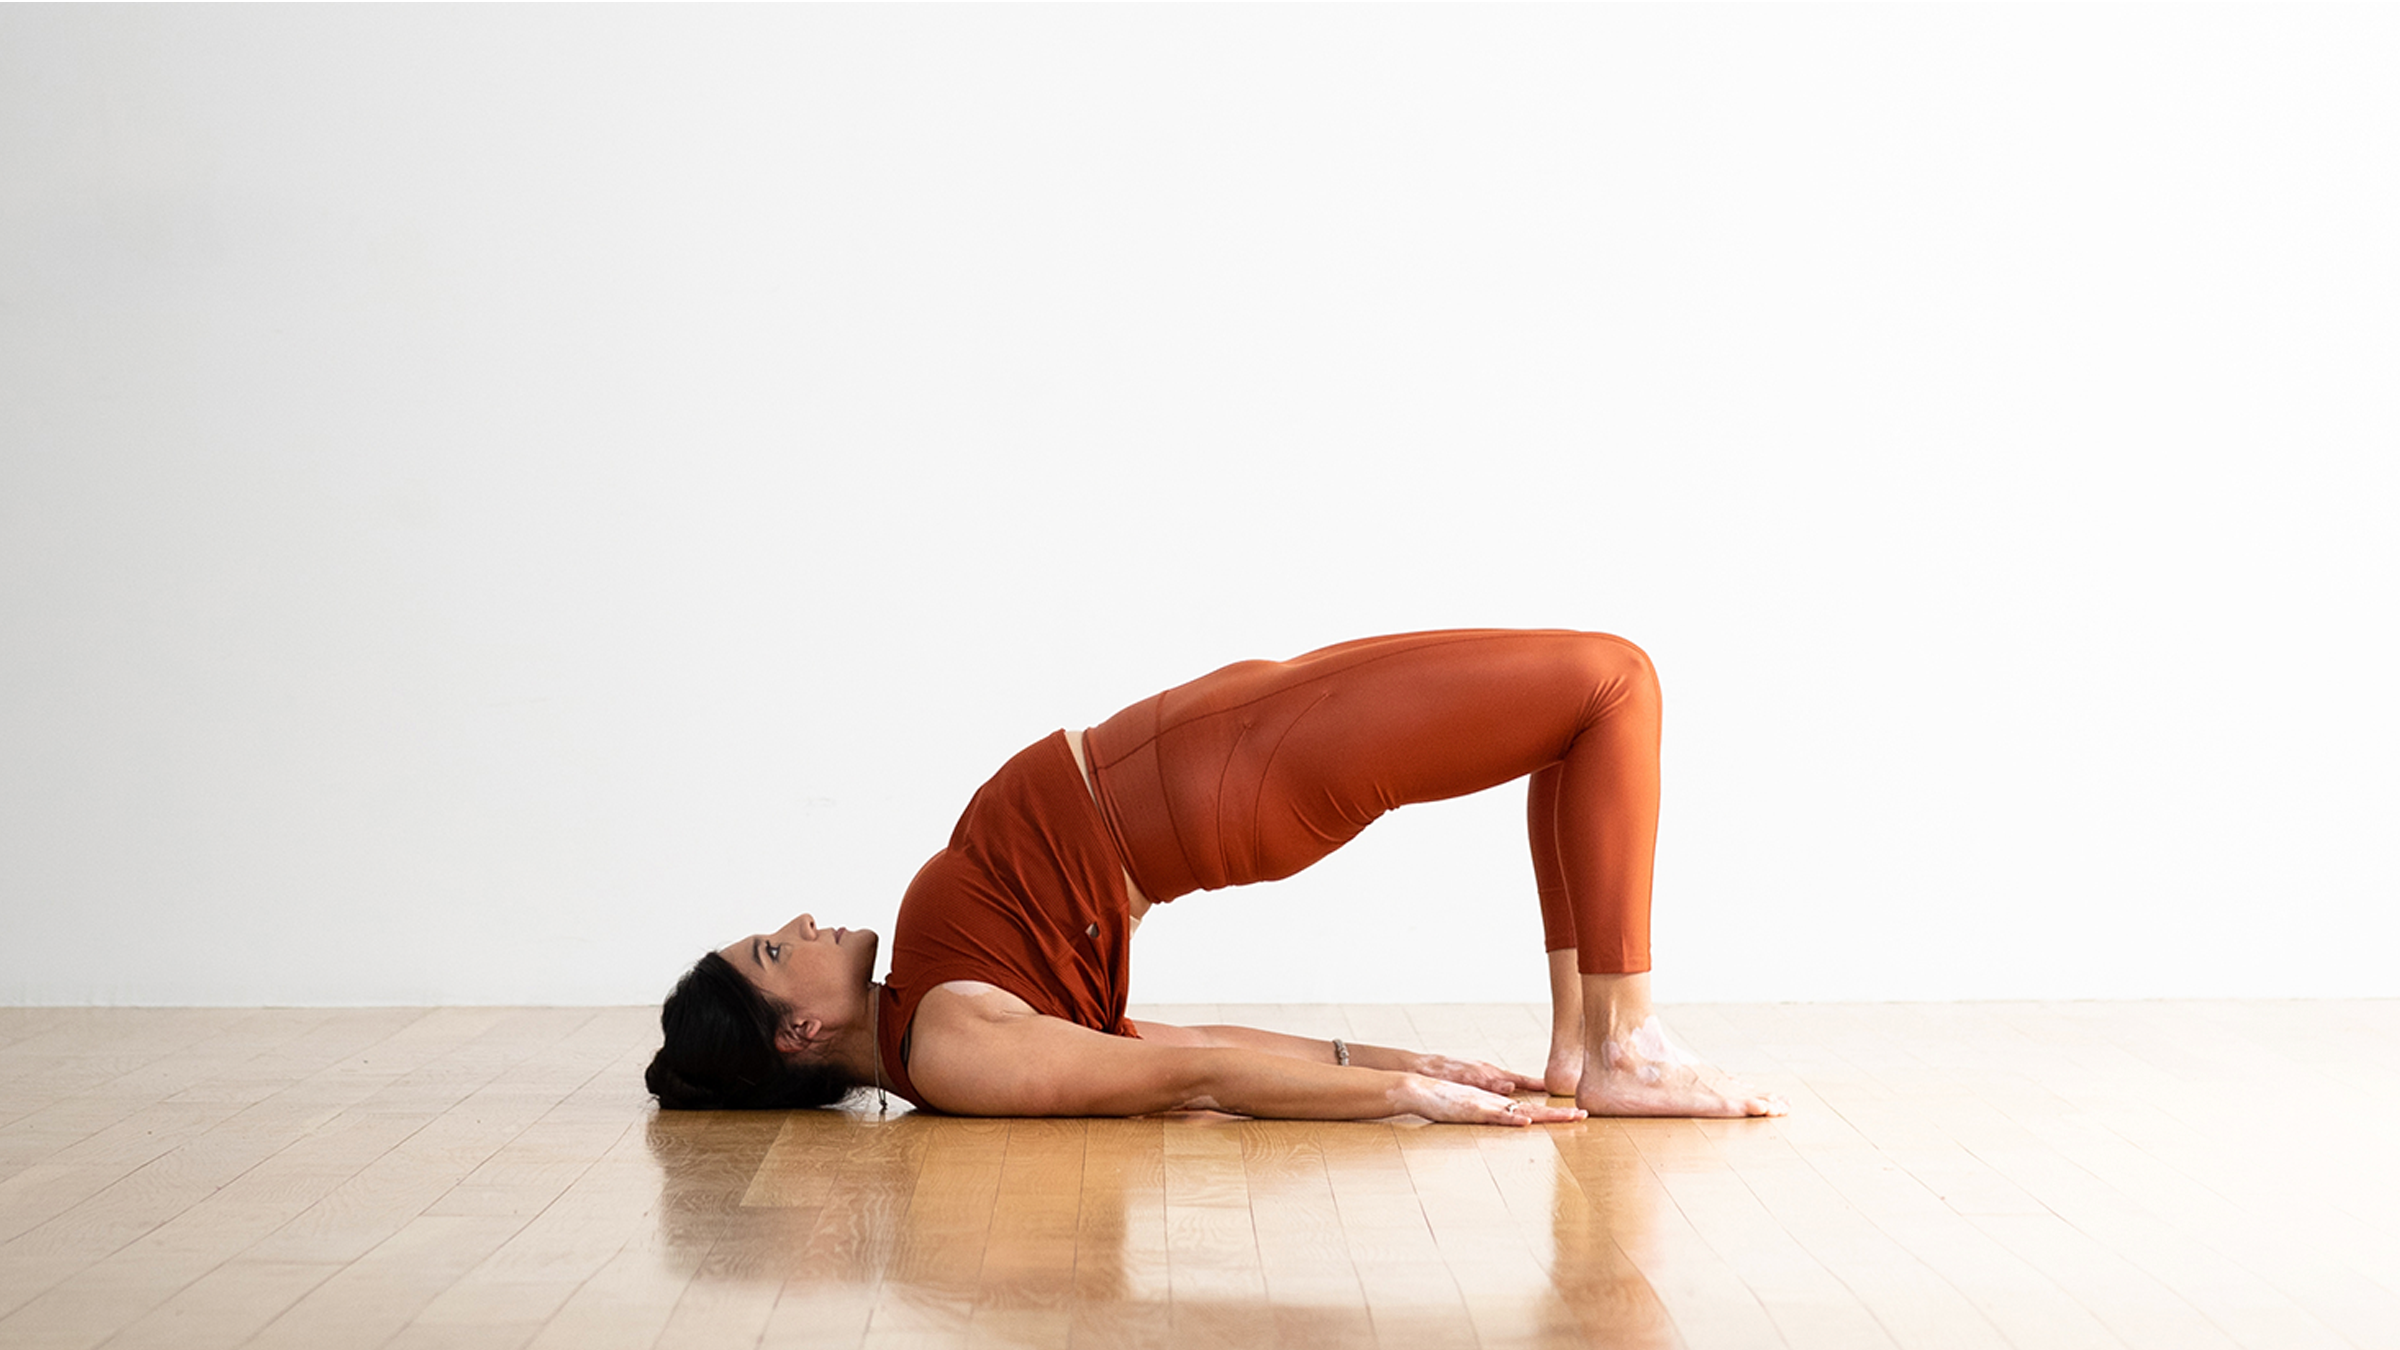
4. Bridge Pose (Setu Bandhasana)


This pose is a hip opener that can help to relieve pressure on the digestive system. To do Bridge Pose, lie on your back with your knees bent and your feet flat on the floor. Place your arms at your sides, palms down. Slowly lift your hips off the ground, keeping your knees bent. Hold the pose for 5-10 breaths.

These are just a few of the many yoga poses that can help relieve constipation. If you are struggling with constipation, it is important to talk to your doctor to rule out any underlying medical conditions. However, yoga can be a safe and effective way to relieve constipation and improve your overall digestive health.

Other tips for relieving constipation

In addition to yoga, there are other things you can do to relieve constipation, such as:

  • Drinking plenty of fluids, especially water
  • Eating a high-fiber diet
  • Getting regular exercise
  • Avoiding foods that are constipating, such as dairy products, processed foods, and sugary drinks
  • Taking over-the-counter laxatives, if necessary                                                               If you have tried these tips and you are still struggling with constipation, talk to your doctor. They may be able to recommend other treatments or help you identify an underlying medical condition that is causing your constipation.
Tagged : / / / /

4 Yoga Asanas for Healthy Hair Growth

4 Yoga Asanas for Healthy Hair Growth
Yoga is a great way to improve your overall health and well-being, and it can also be beneficial for your hair. In fact, there are several yoga asanas that have been shown to promote hair growth and thickness.

Here are four yoga asanas that are great for hair growth:

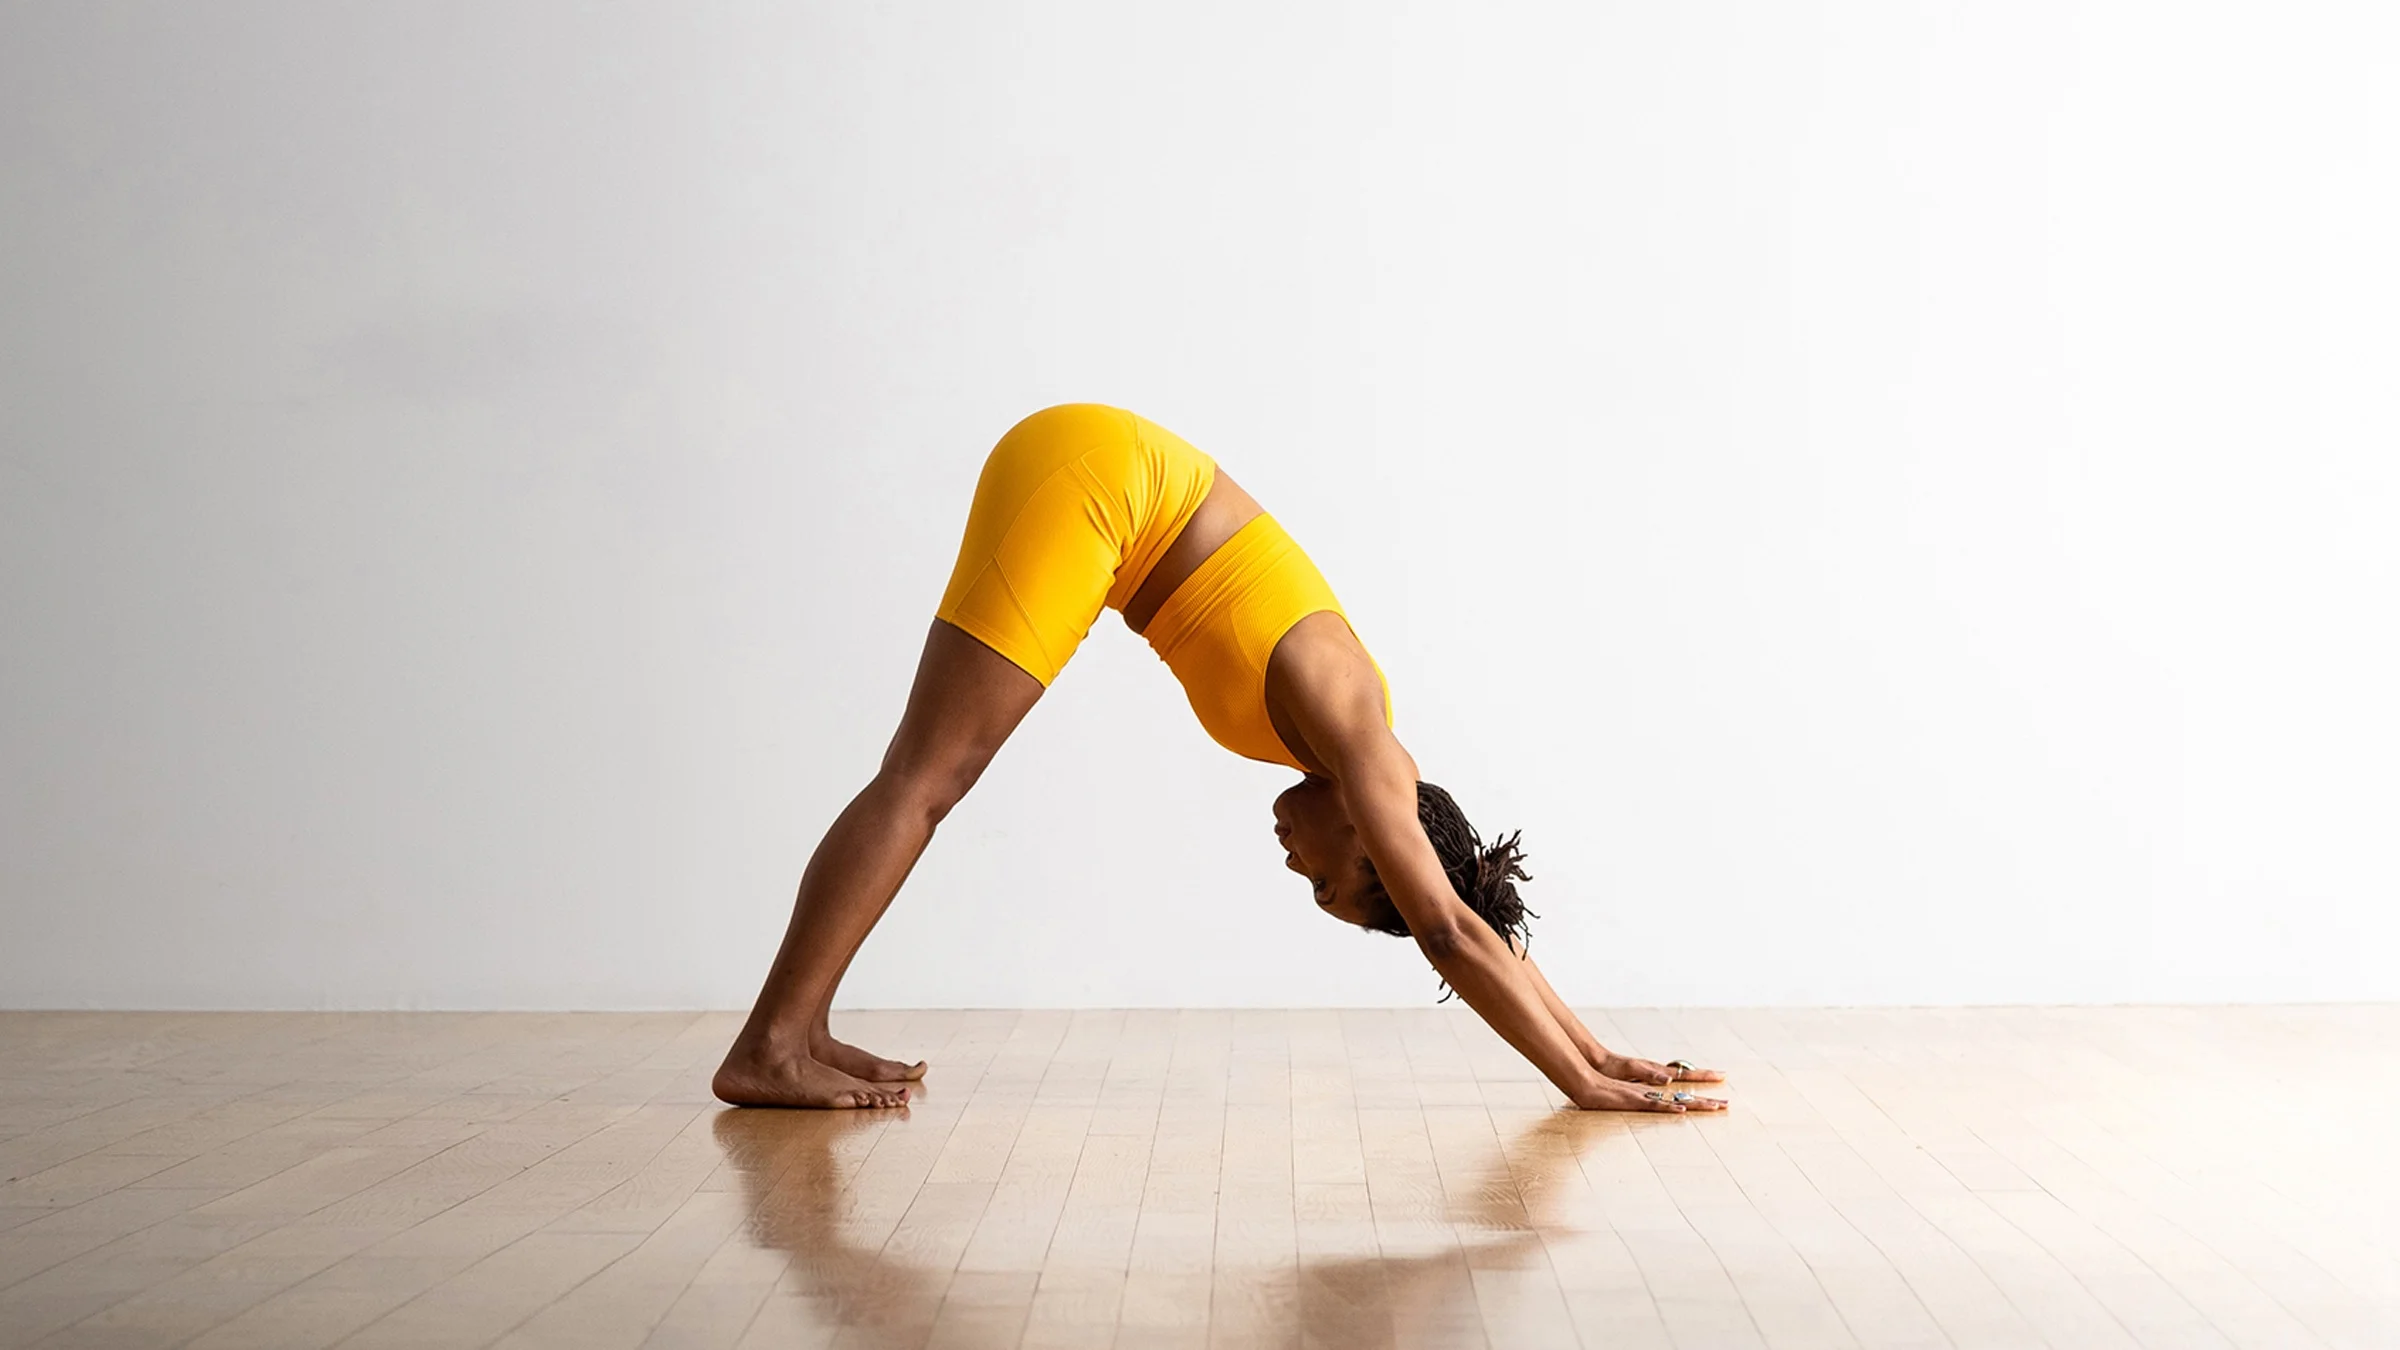
1. Adho Mukha Svanasana (Downward Facing Dog Pose)
Adho Mukha Svanasana is a classic yoga pose that is known for its many benefits, including improved circulation, digestion, and flexibility. It is also a great pose for hair growth.

To do Adho Mukha Svanasana, start in a plank position with your hands shoulder-width apart and your feet hip-width apart. Lower your body down until your chest touches your thighs and your chin touches the ground. Keep your legs straight and your back flat. Hold the pose for 5-10 breaths, then slowly come back up to standing.

Adho Mukha Svanasana increases blood flow to the scalp, which helps to nourish the hair follicles and promote hair growth. It also helps to relieve stress, which can be a contributing factor to hair loss.

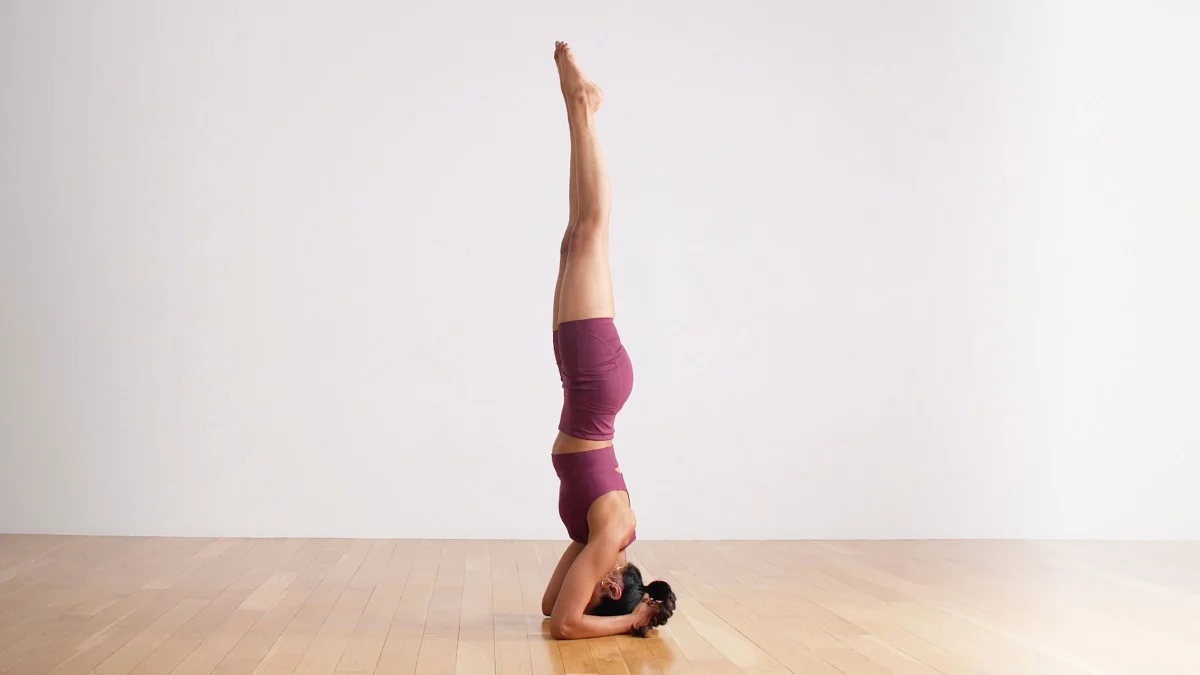
2. Sirsasana (Headstand Pose)
Sirsasana is a more advanced yoga pose, but it is also one of the most effective poses for hair growth. In Sirsasana, you balance your body upside down on your head and shoulders. This pose can be challenging, but it is definitely worth it for the benefits it offers for hair growth.

To do Sirsasana, start by lying on your back with your legs straight up in the air. Place your hands on the ground next to your ears, with your fingers facing forward. Inhale and lift your legs up, keeping your body in a straight line from your head to your heels. Rest your head on the ground and balance your body on your hands and shoulders. Hold the pose for as long as you can, then slowly come back down to lying on your back.

Sirsasana increases blood flow to the scalp and stimulates the hair follicles. It also helps to balance the hormones, which can be beneficial for preventing hair loss.

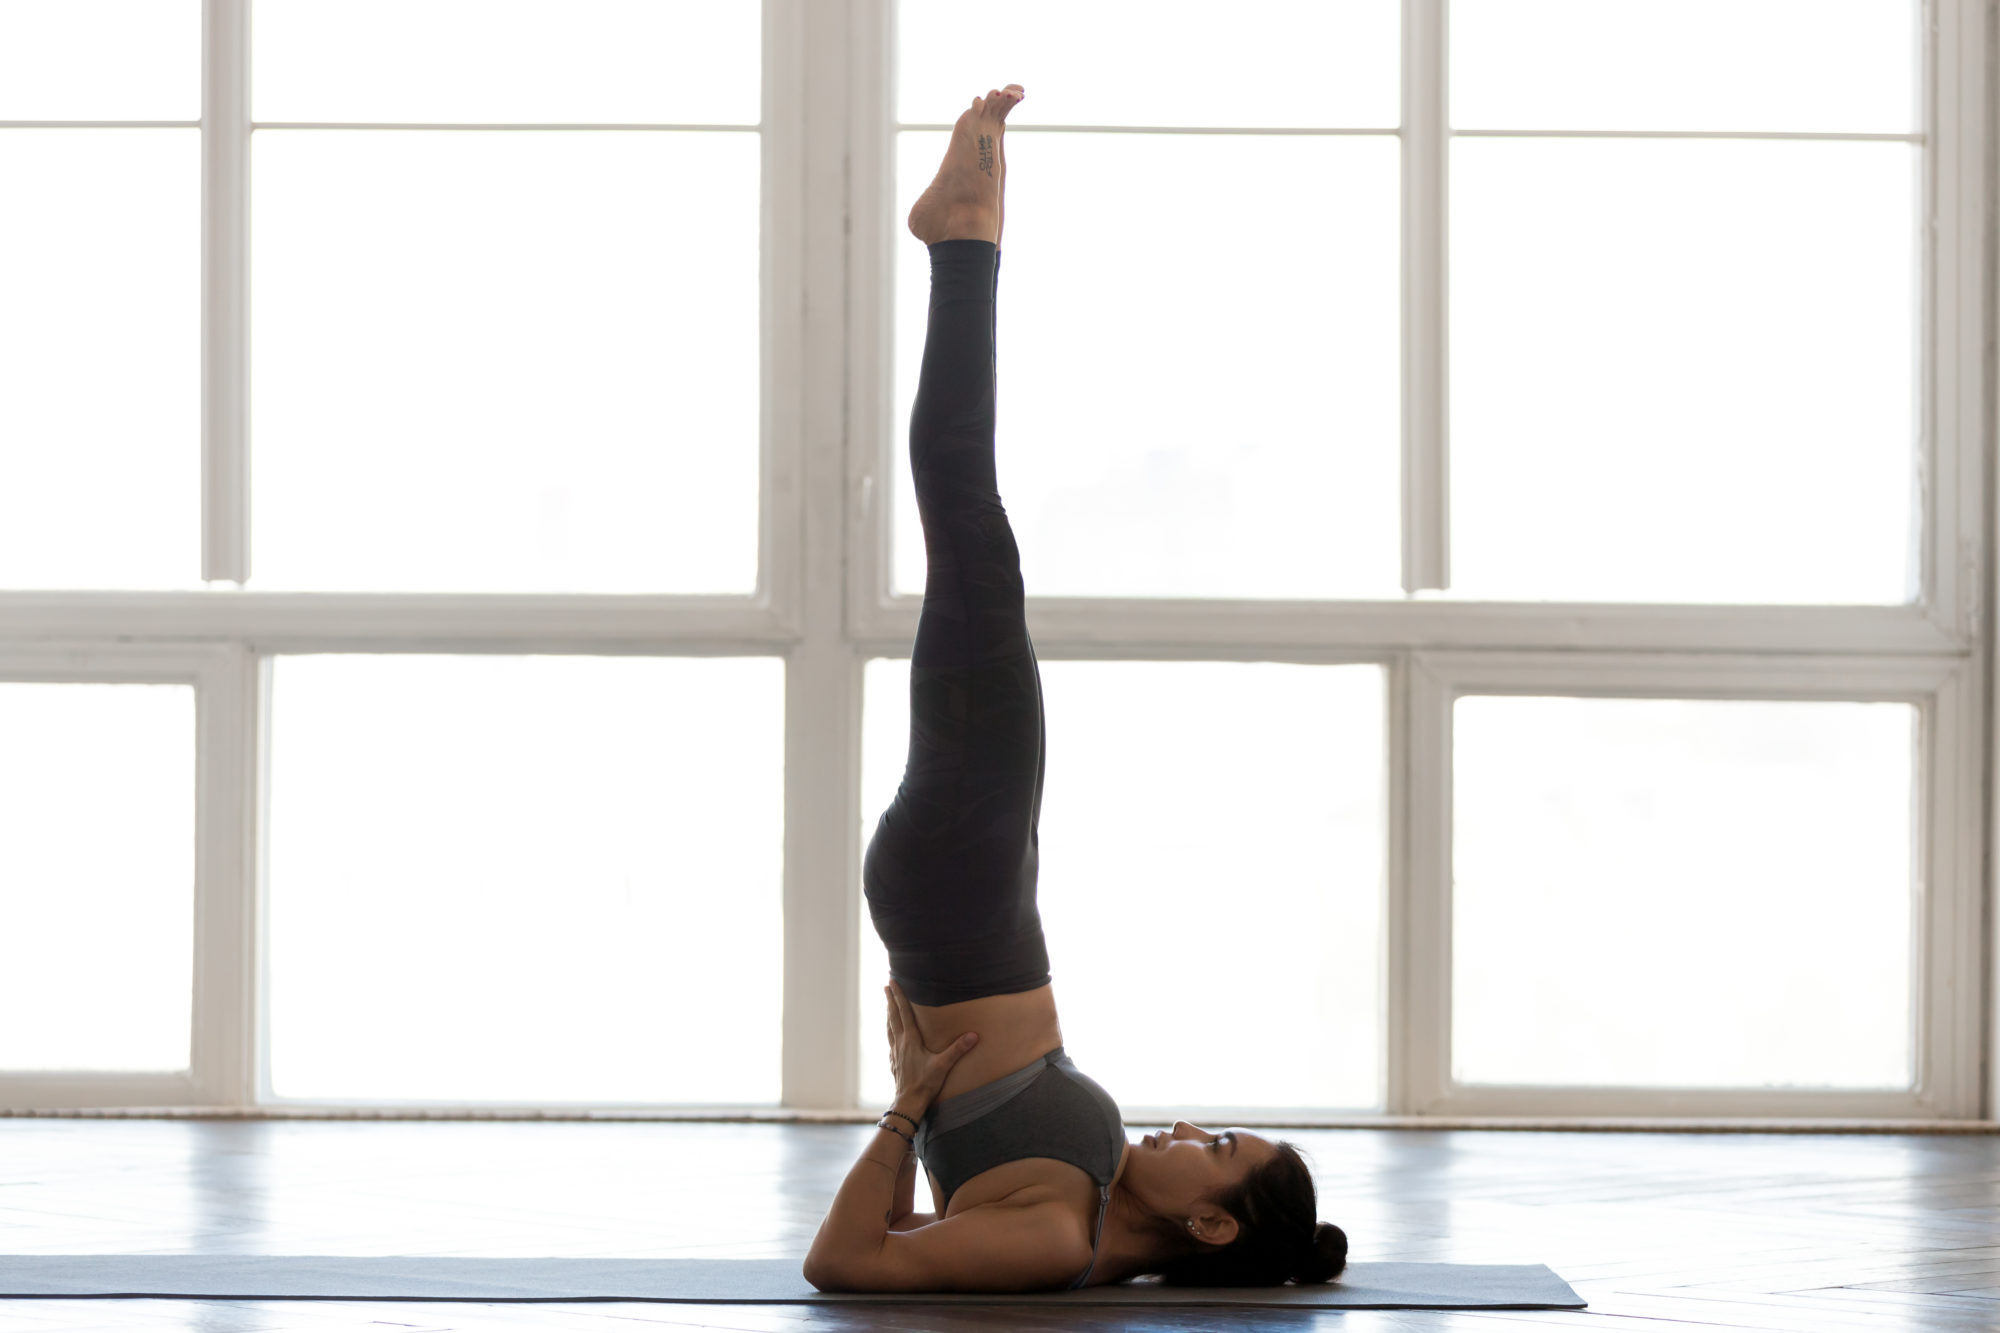
3. Sarvangasana (Shoulder Stand Pose)
Sarvangasana is another advanced yoga pose that is great for hair growth. In Sarvangasana, you balance your body on your shoulders with your legs up in the air. This pose can be challenging, but it is definitely worth it for the benefits it offers for hair growth.

To do Sarvangasana, start by lying on your back with your legs straight up in the air. Bend your knees and place your feet on your hips. Inhale and lift your hips up off the ground, keeping your legs straight. Rest your shoulders on the ground and balance your body on your shoulders and feet. Hold the pose for as long as you can, then slowly come back down to lying on your back.

Sarvangasana increases blood flow to the scalp and stimulates the hair follicles. It also helps to improve digestion, which can be beneficial for overall health and well-being.

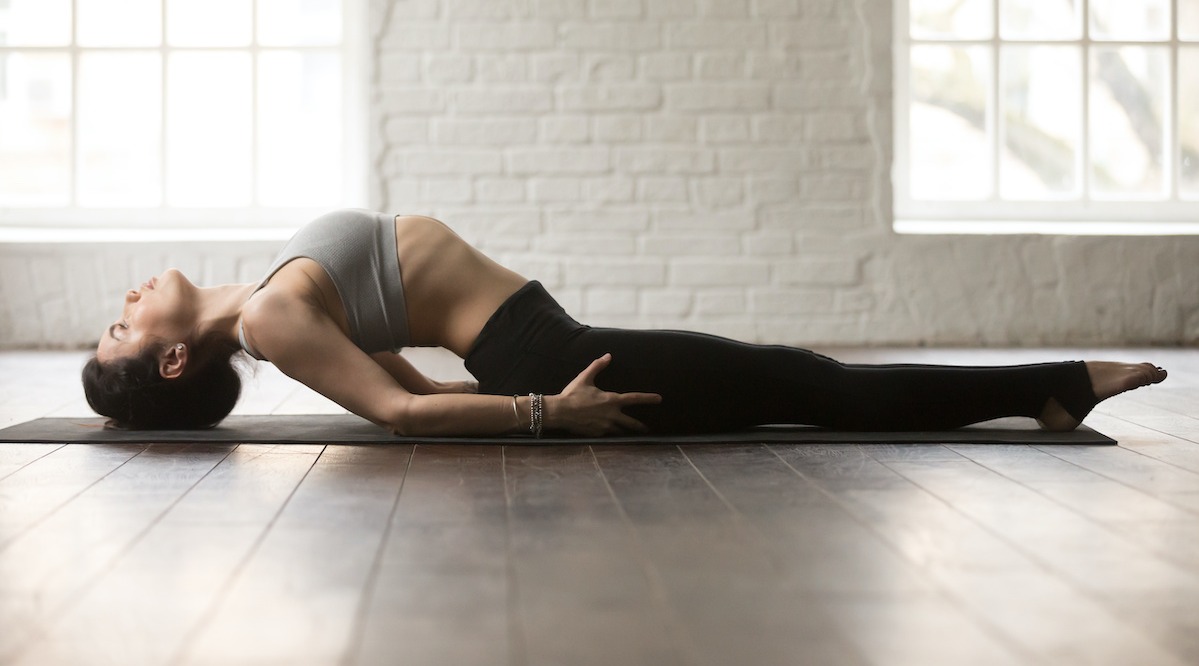
4. Matsyasana (Fish Pose)
Matsyasana is a gentle yoga pose that is easy to do and still offers many benefits for hair growth. In Matsyasana, you lie on your back with your legs straight up in the air and your head tilted back. This pose helps to stretch the neck and scalp, which can improve circulation and promote hair growth.

To do Matsyasana, start by lying on your back with your legs straight up in the air. Bend your knees and place your feet on your hips. Inhale and lift your head and chest up off the ground, keeping your arms straight and your elbows bent. Rest your hands on your lower back for support. Hold the pose for as long as you can, then slowly come back down to lying on your back.

Matsyasana also helps to relieve stress, which can be a contributing factor to hair loss.

In addition to these four asanas, there are many other yoga poses that can be beneficial for hair growth. If you are looking for a way to improve the health of your hair, yoga is a great option. Just be sure to start slowly and gradually increase the duration of each pose as you get stronger.

Tagged : / / / /

5 Simple Yoga Asanas To Enhance Your Immunity And Improve Blood Circulation

5 Simple Yoga Asanas To Enhance Your Immunity And Improve Blood Circulation
Yoga is a great way to improve your overall health and well-being. It can help to reduce stress, improve flexibility, and strengthen your muscles. Yoga can also help to improve blood circulation and immunity.

Blood Circulation

Blood circulation is the process of blood flowing through your body. It is important for delivering oxygen and nutrients to your cells, and for removing waste products. Poor blood circulation can lead to a number of problems, including fatigue, pain, and cold hands and feet.

Immunity

Your immune system is your body’s defense against infection. It helps to fight off germs and bacteria. When your immune system is strong, you are less likely to get sick.

Yoga Poses for Improved Blood Circulation and Immunity

There are many yoga poses that can help to improve blood circulation and immunity. Here are 5 simple poses that you can try:

1. Downward-Facing Dog (Adho Mukha Svanasana)


This pose is a great way to improve blood circulation to your head, neck, and spine. It also helps to strengthen your arms and legs.

To do Downward-Facing Dog, start on your hands and knees. Spread your fingers wide and press your palms into the ground. Inhale and lift your knees off the ground, keeping your hips in line with your knees and your spine long. Reach your heels towards the ground, but don’t force it if you can’t reach them. Hold for 5-10 breaths, then exhale and lower your knees back to the ground.

2. Cobra Pose (Bhujangasana)


This pose is another great way to improve blood circulation to your head, neck, and spine. It also helps to strengthen your back muscles.

To do Cobra Pose, start on your stomach with your forehead on the ground. Place your hands under your shoulders, with your fingers facing forward. Inhale and lift your chest off the ground, keeping your arms straight. Gaze forward and hold for 5-10 breaths, then exhale and lower your chest back to the ground.

3. Bridge Pose (Setu Bandhasana)


This pose is a great way to improve blood circulation to your pelvis and legs. It also helps to strengthen your core muscles.

To do Bridge Pose, start lying on your back with your knees bent and your feet flat on the ground. Place your arms by your sides, with your palms facing down. Inhale and lift your hips off the ground, keeping your knees bent and your feet flat on the ground. Hold for 5-10 breaths, then exhale and lower your hips back to the ground.

4. Seated Forward Bend (Paschimottanasana)


This pose is a great way to improve blood circulation to your legs and hips. It also helps to stretch your hamstrings and spine.

To do Seated Forward Bend, start sitting on the ground with your legs extended in front of you. Bend forward from your hips, keeping your back straight. Reach for your toes, or as far as you can comfortably reach. Hold for 5-10 breaths, then inhale and come back to sitting.

5. Legs Up the Wall Pose (Viparita Karani)


This pose is a great way to improve blood circulation to your legs and feet. It also helps to relax your mind and body.

To do Legs Up the Wall Pose, start by sitting on the ground with your legs extended in front of you. Lean back against a wall, and slide your legs up the wall until your hips are at a 90-degree angle. Rest your arms by your sides, with your palms facing up. Close your eyes and relax for 5-10 minutes.

Conclusion

These are just a few of the many yoga poses that can help to improve blood circulation and immunity. If you are new to yoga, it is a good idea to start with these simple poses and gradually work your way up to more challenging poses. With regular practice, you will start to see and feel the benefits of yoga.

Additional Tips

When doing yoga, it is important to listen to your body and not push yourself too hard.
If you have any health conditions, talk to your doctor before starting a yoga practice.
Make sure to warm up before doing any yoga poses.
Breathe deeply and slowly throughout your yoga practice.
Relax and enjoy the benefits of yoga!

Tagged : / / / /
Verified by ExactMetrics